Introduction - Using CodeDeploy and Terraform
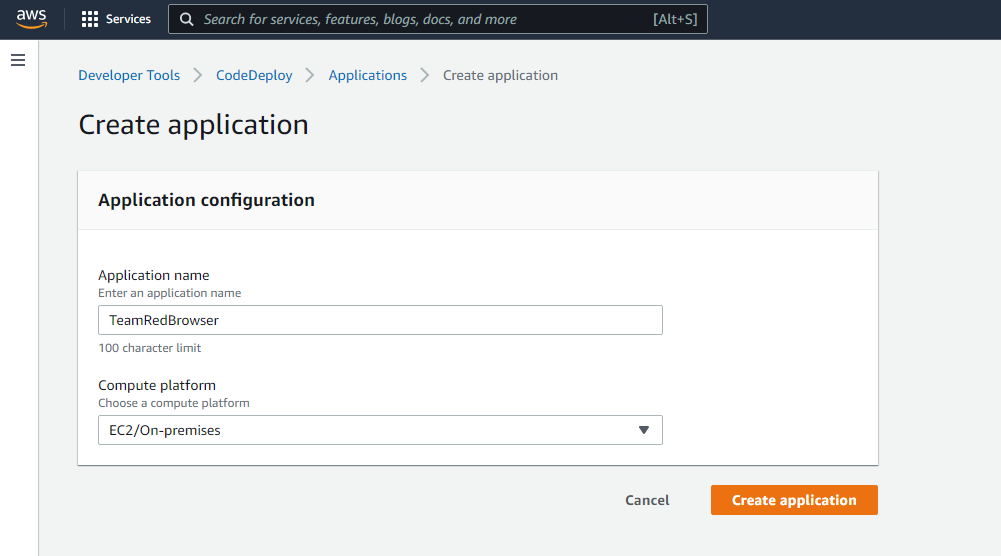
Let’s say you have a private GitHub repository that you want to manage on any instance on an AWS account freely. That is what I will be discussing in this blog. Let us start by creating a CodeDeploy application. The application name can be whatever you want, but the compute platform we will be utilizing is EC2/On-Premises. A little background: our application will ultimately run on an EC2 Instance that was created via Terraform, as showcased in my previous Terraform blog. Let’s take a quick look at what the CodeDeploy application creation process looks like, a few screenshots at a time.
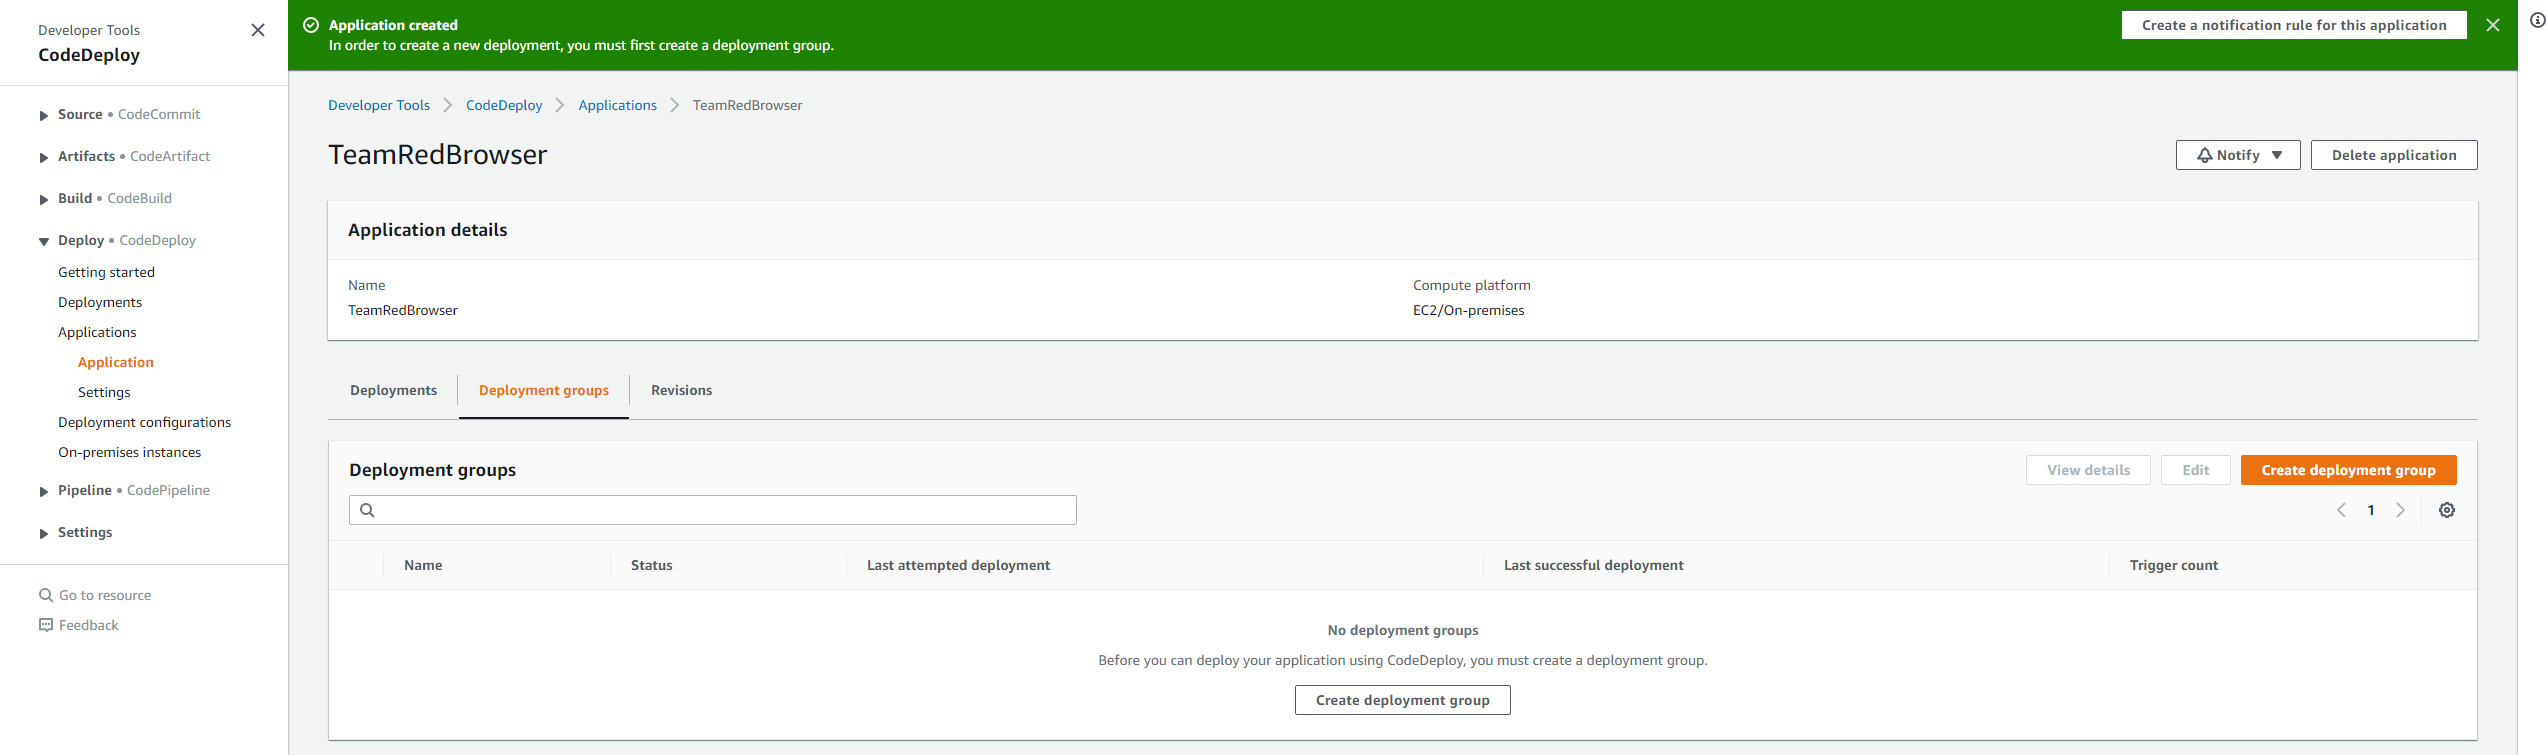
You will notice in the second screenshot that there is a message in green that says we must create a deployment group for this application. Let’s do that, but first, be clear about what’s happening behind the scenes with our EC2 Instance that is about to be terraformed. This process relies on a few packages not yet installed on some EC2 Instances, including: git, ruby-full, and wget. Add sudo apt install -y ruby-full wget git to your Terraform file so that these packages get installed at the EC2 Instance’s creation, then add the following wget line (we will continue using US West 2 as our region from the last tutorial, so note that the URL in this wget is US-WEST specific! change it if you are using a different region): wget https://aws-codedeploy-us-west-2.s3.us-west-2.amazonaws.com/latest/install, then chmod +x ./install, and finally sudo ./install auto to download and run the CodeDeploy agent from AWS at creation for the EC2 Instance.
Creating a Deployment Group
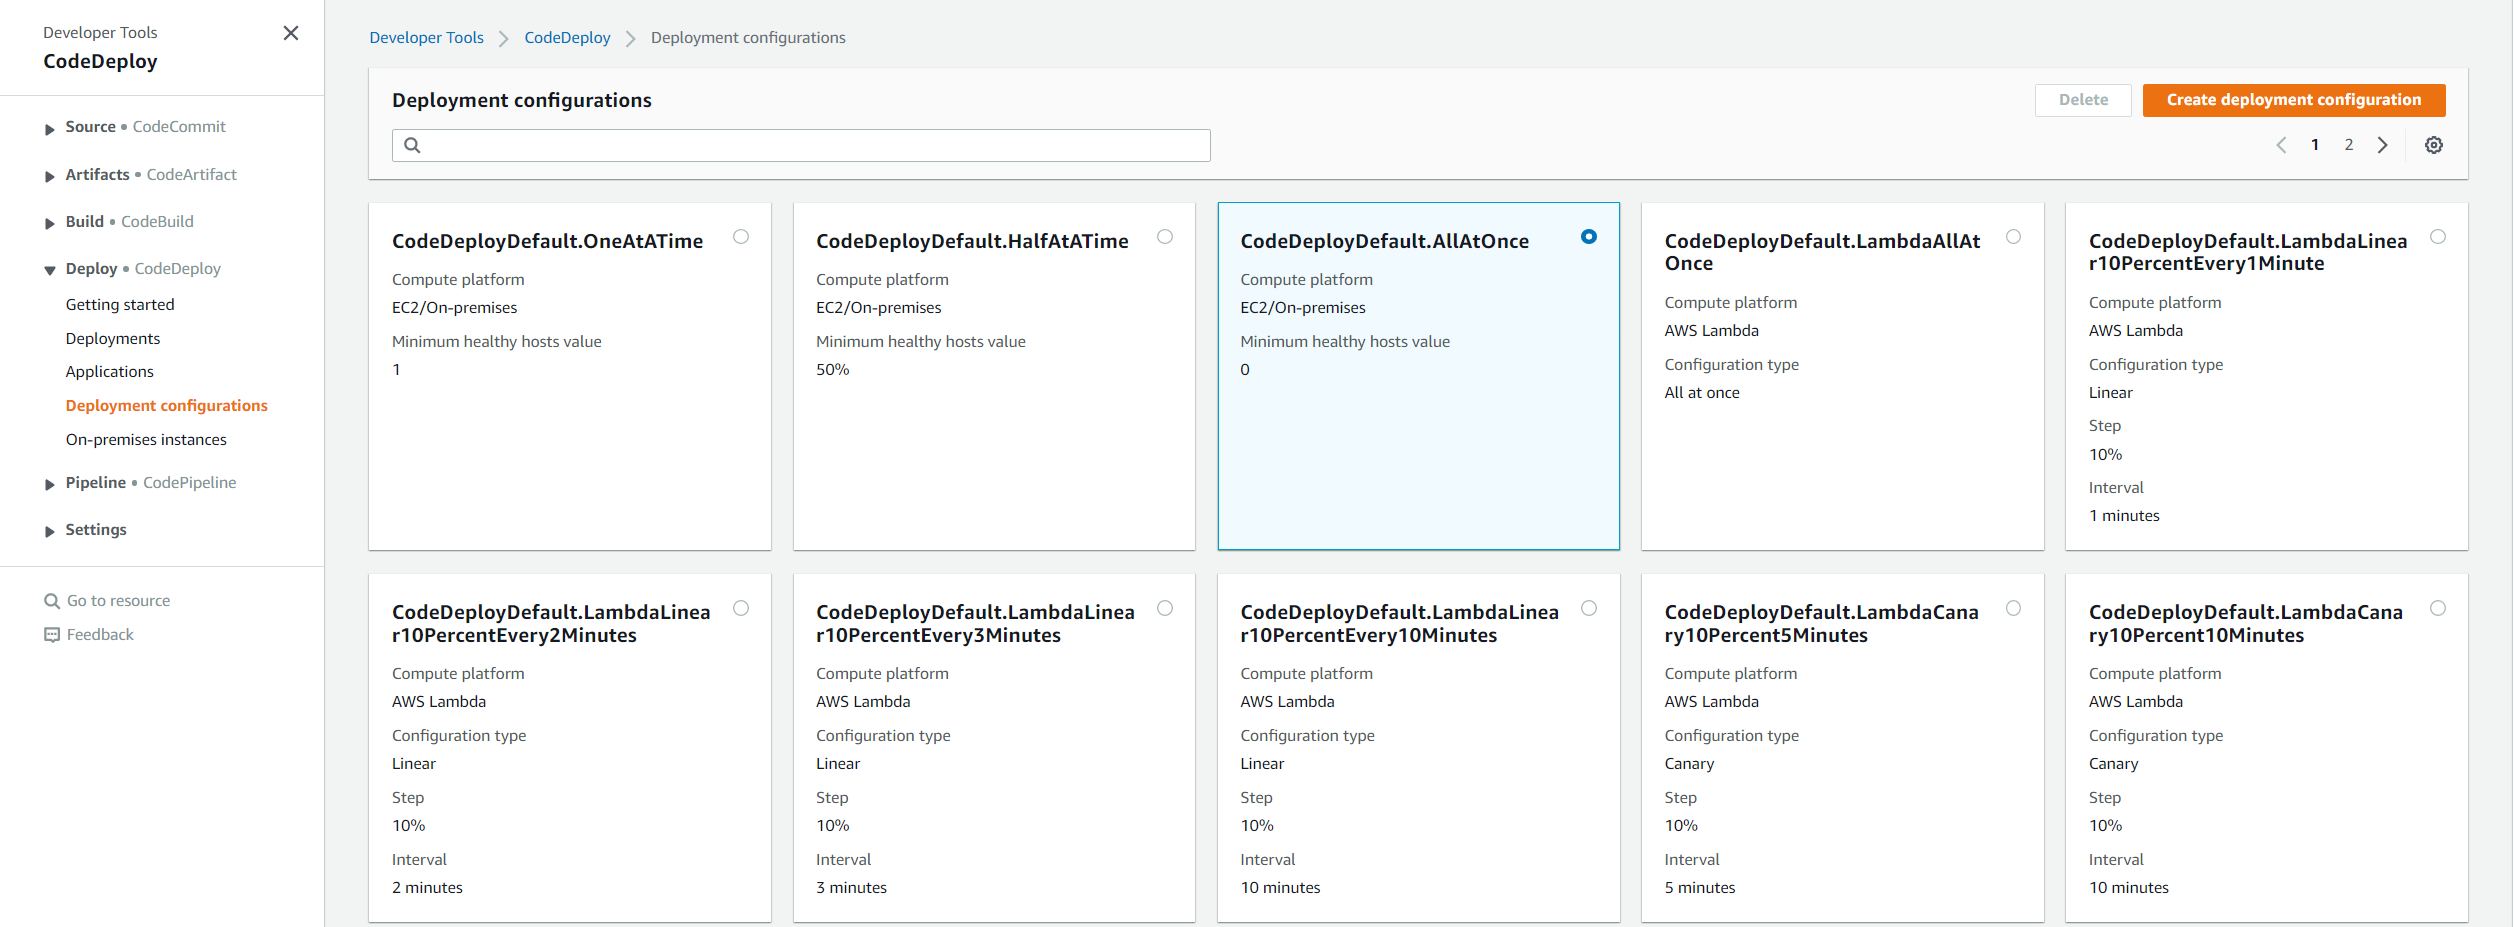
As mentioned above, we need a deployment group for the application. On the side bar where it says Developer Tools and then CodeDeploy, click on Deploy > Deployment Configurations to bring you to default deployment configurations. Let’s choose the default for this demonstration: CodeDeployDefault.AllAtOnce. Look below to see what that looks like.
Once you click the create deployment configuration button, name it whatever you’d like and select EC2 instance on the second option, since our application is being terraformed in an EC2 Instance. Now, return to the Create Deployment Group screen to continue configuration.
CodeDeploy - Deployment Group Name, Service Role, and Development Type
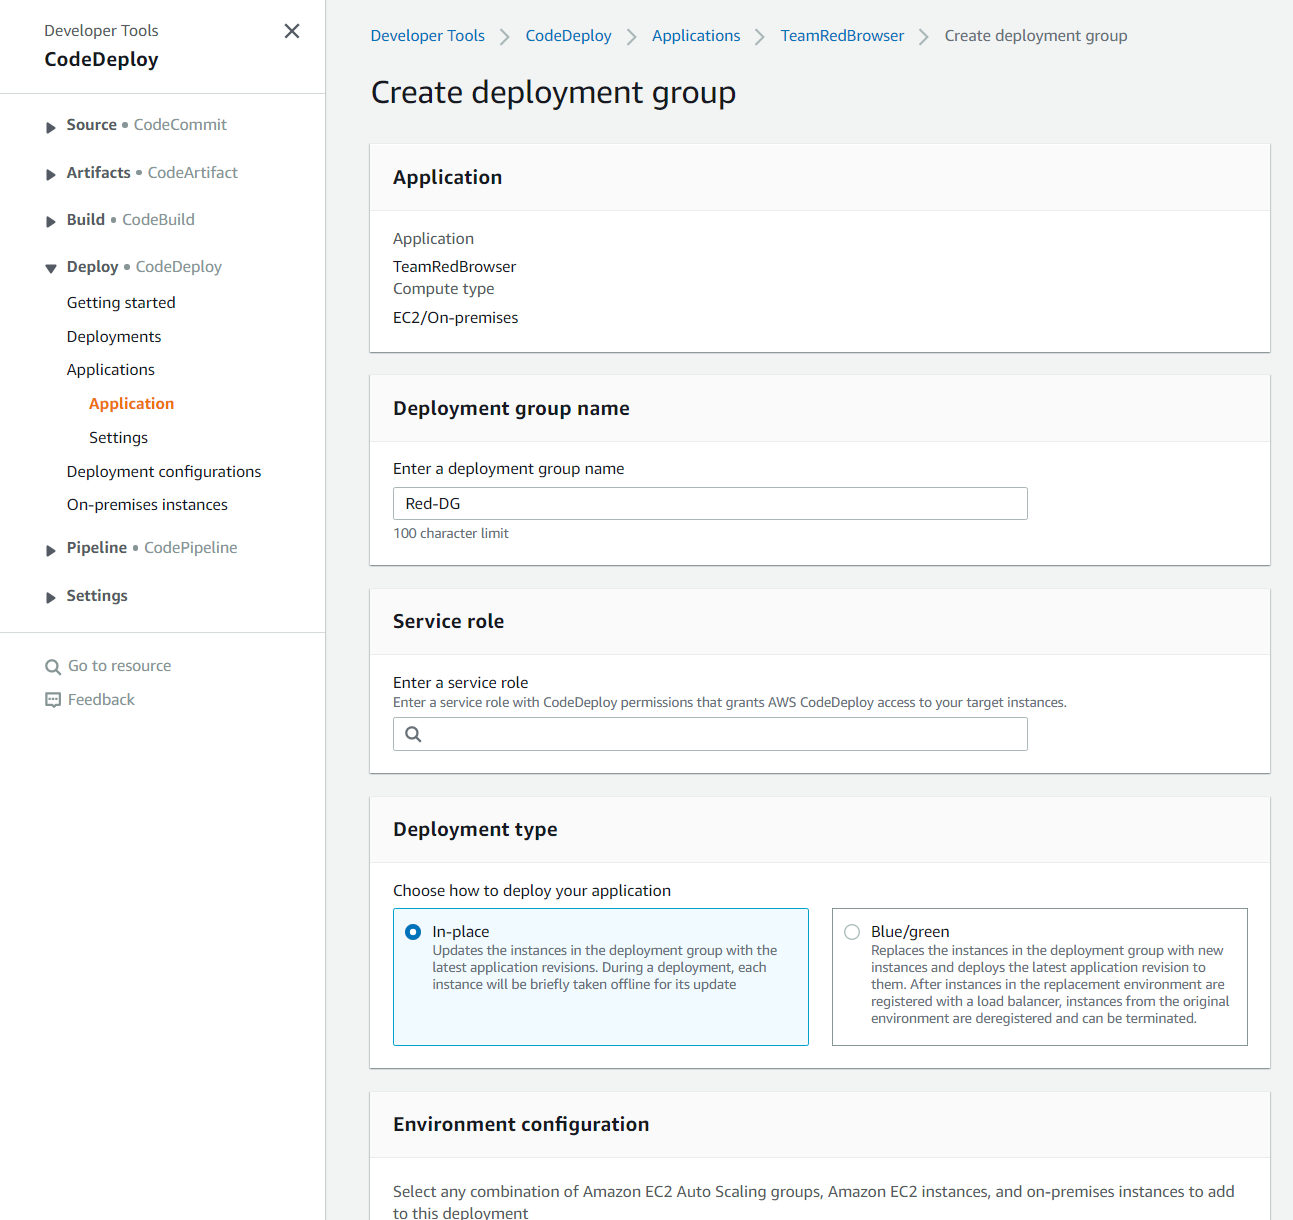
Let’s take this one chunk at a time. Here we see a few different panes: one for our deployment group name which can be whatever, one for our service role, and one for our deployment type. I will choose in-place for our deployment type. This simply uses the original instance upon which our application was running to deploy our new changes.
However, if we wanted to keep uptime and ensure our users curently using the application in its previous state before changes were made while separate instances with the new code are slowly deployed, we should choose Blue/Green deployment. Blue/Green deployment is obviously the most dynamic and arguably the most useful deployment type if you are running in a production environment where user stability is essential, however, we will be using in-place deployment to make changes that bring our EC2 Instance down for brief periods of time.
Service Roles
For the service role, this process is a little more involved than the rest, and is NOT optional when first setting up a deployment group.
First, navigate to the IAM Console and choose Roles > Create Role, after which you must select AWS service as the trusted entity type, and then select CodeDeploy under the Use cases for other AWS services tab. In that search box, type CodeDeploy and then enable the radio menu option labeled CodeDeploy for use with our EC2 instance - the other two options are irrelevant to our usecase here for now. as shown here. 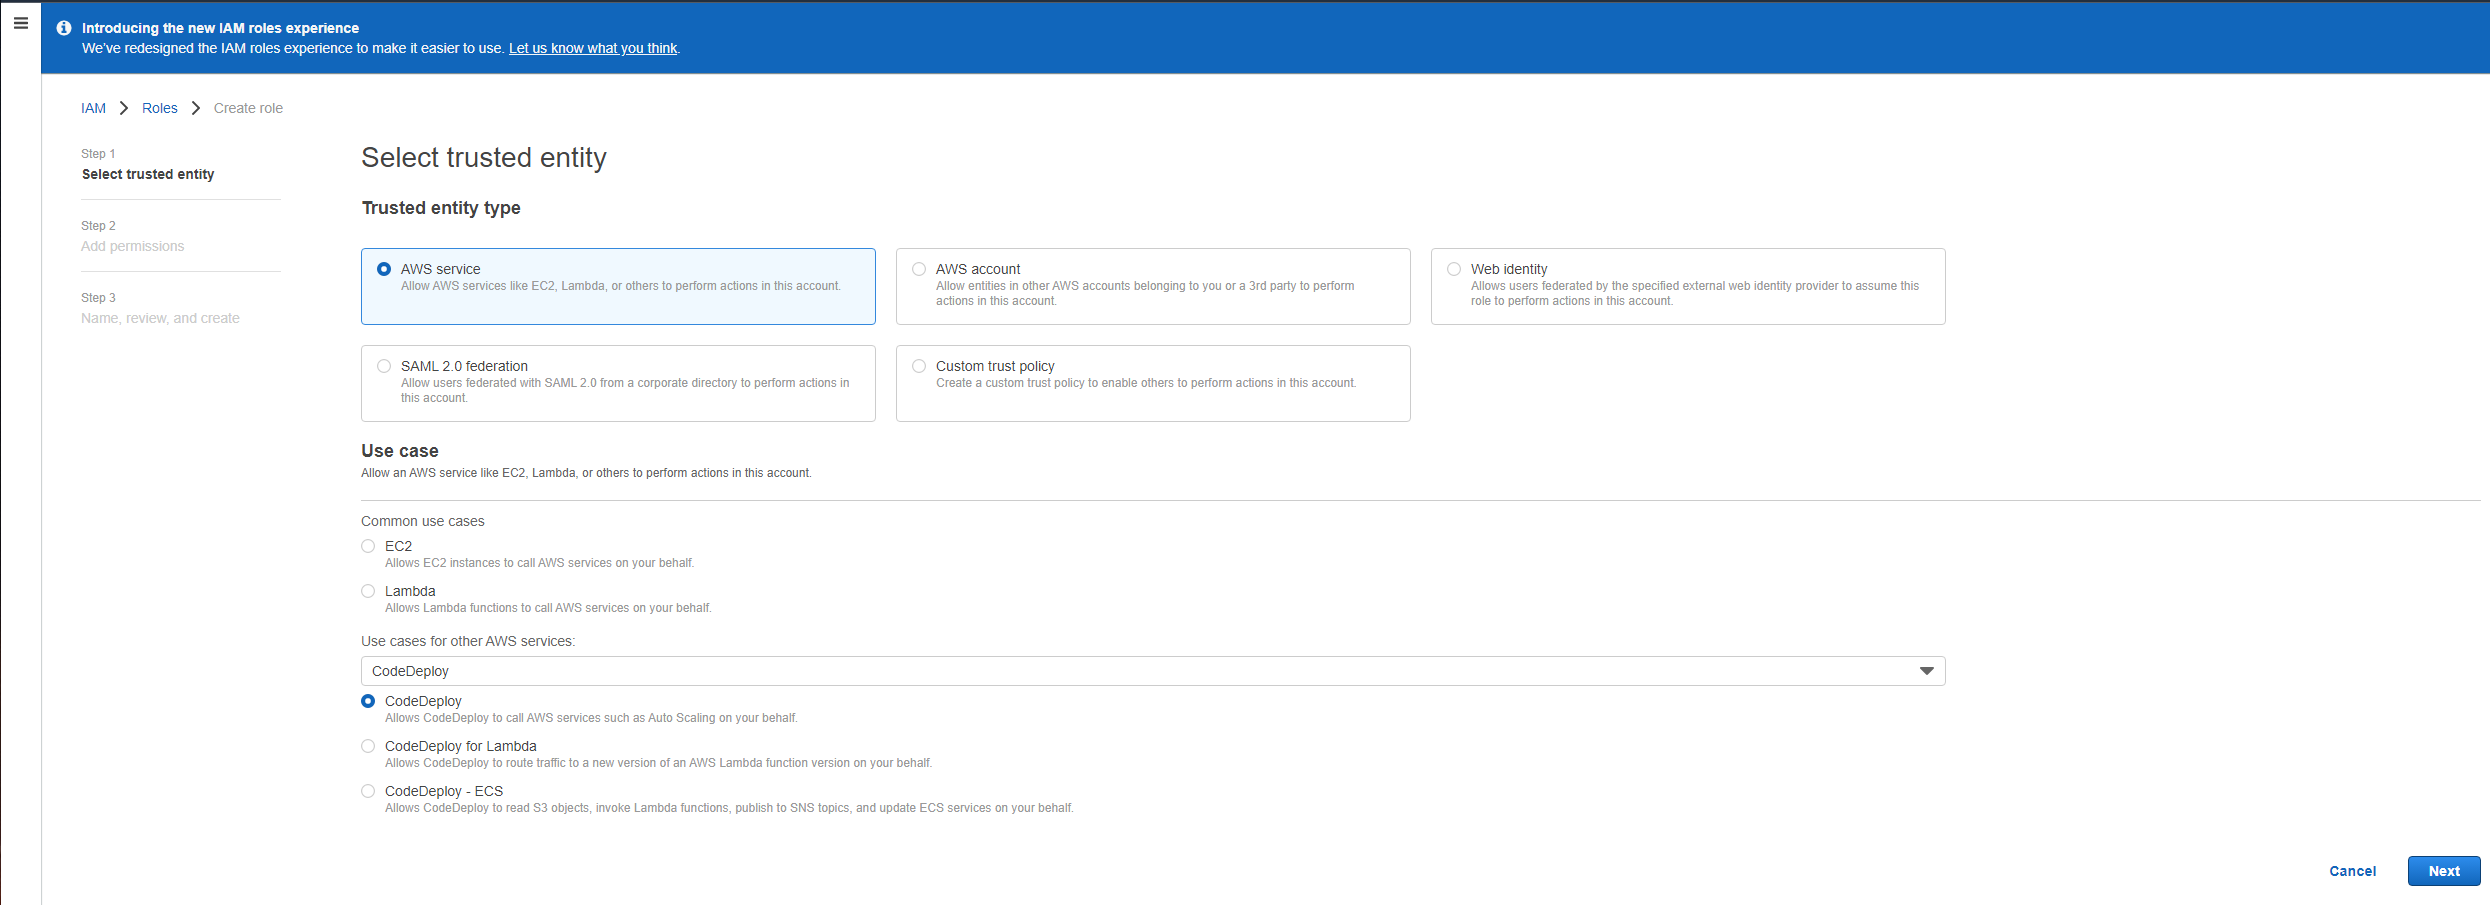
Click Next to go to permissions, then Next again to reach the Name, Review and Create section. Scroll to the bottom and select the blue Create Role button. Now you can select this service role from the Create Deployment Group tab we were working on before - you may need to refresh it if you created the IAM role on a separate tab though.
CodeDeploy - Environment Configuration and Agent Configuration
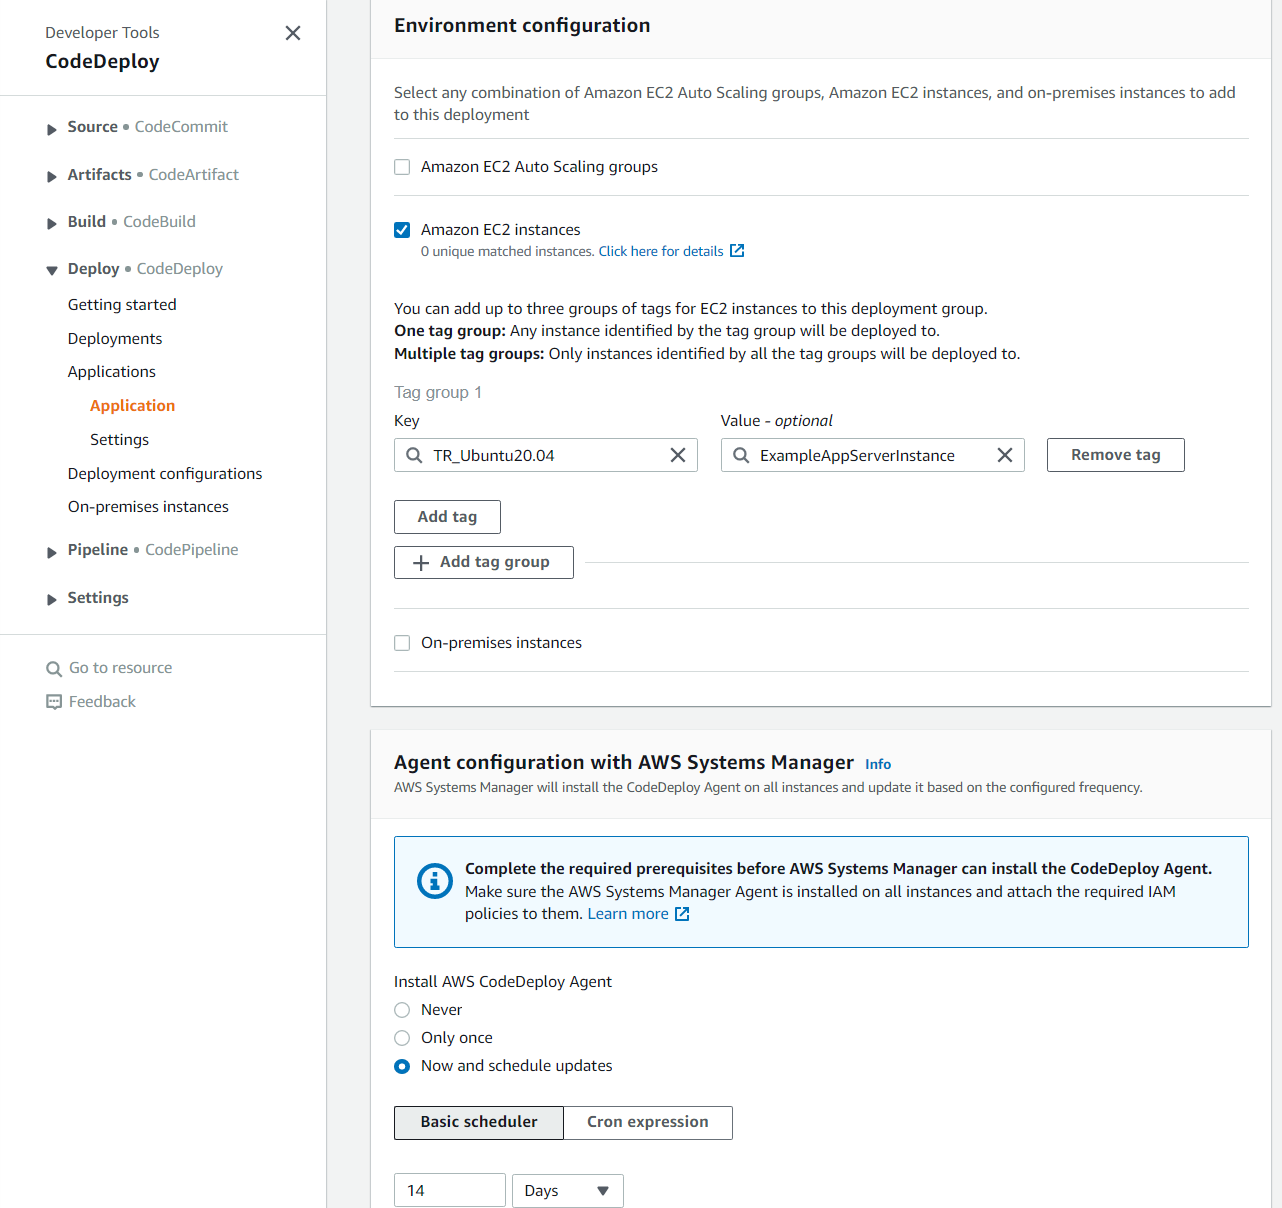
Here we will be focusing on the environment configuration and agent configuration with AWS Systems Manager sections. As discussed before, we are terraforming our EC2 instance into creation, so for our environment configuration, let’s add the EC2 Instance tag that existed in our EC2 Instance’s terraform block, which was TR_Ubuntu20.04.
The value box is where we will place TR_Ubuntu20.04, while the key box is where we will put “Name,” as in my previous tutorial, we specified that the Key/Value pair of the EC2 Instance was “Name/TR_Ubuntu20.04”. This ensures that only EC2 Instances with this tag (We could also add up to two more additional tags on top of this if we wanted other instance types with specific tags to be deployed to) will be hit by our deployment changes. Finally, for the agent configuration section, just change it from Now and schedule updates to Never, since we will already be installing the agent via our Terraform user data script.
CodeDeploy - Deployment Settings and Load Balancer

The last two sections are our deployment settings and our load balancer, pictured above. We will use CodeDeployDefault.AllAtOnce to simply apply this deployment instantly instead of progressively over time.
For the load balancer section, since our EC2 Instance does not currently have a load balancer attached to it, let us leave this disabled for now by un-checking the Enable load balancing checkbox. Finally, click Create deployment group! Congratulations, you have just created your (likely first if you made it this far viewing this blog) deployment group using CodeDeploy via AWS! 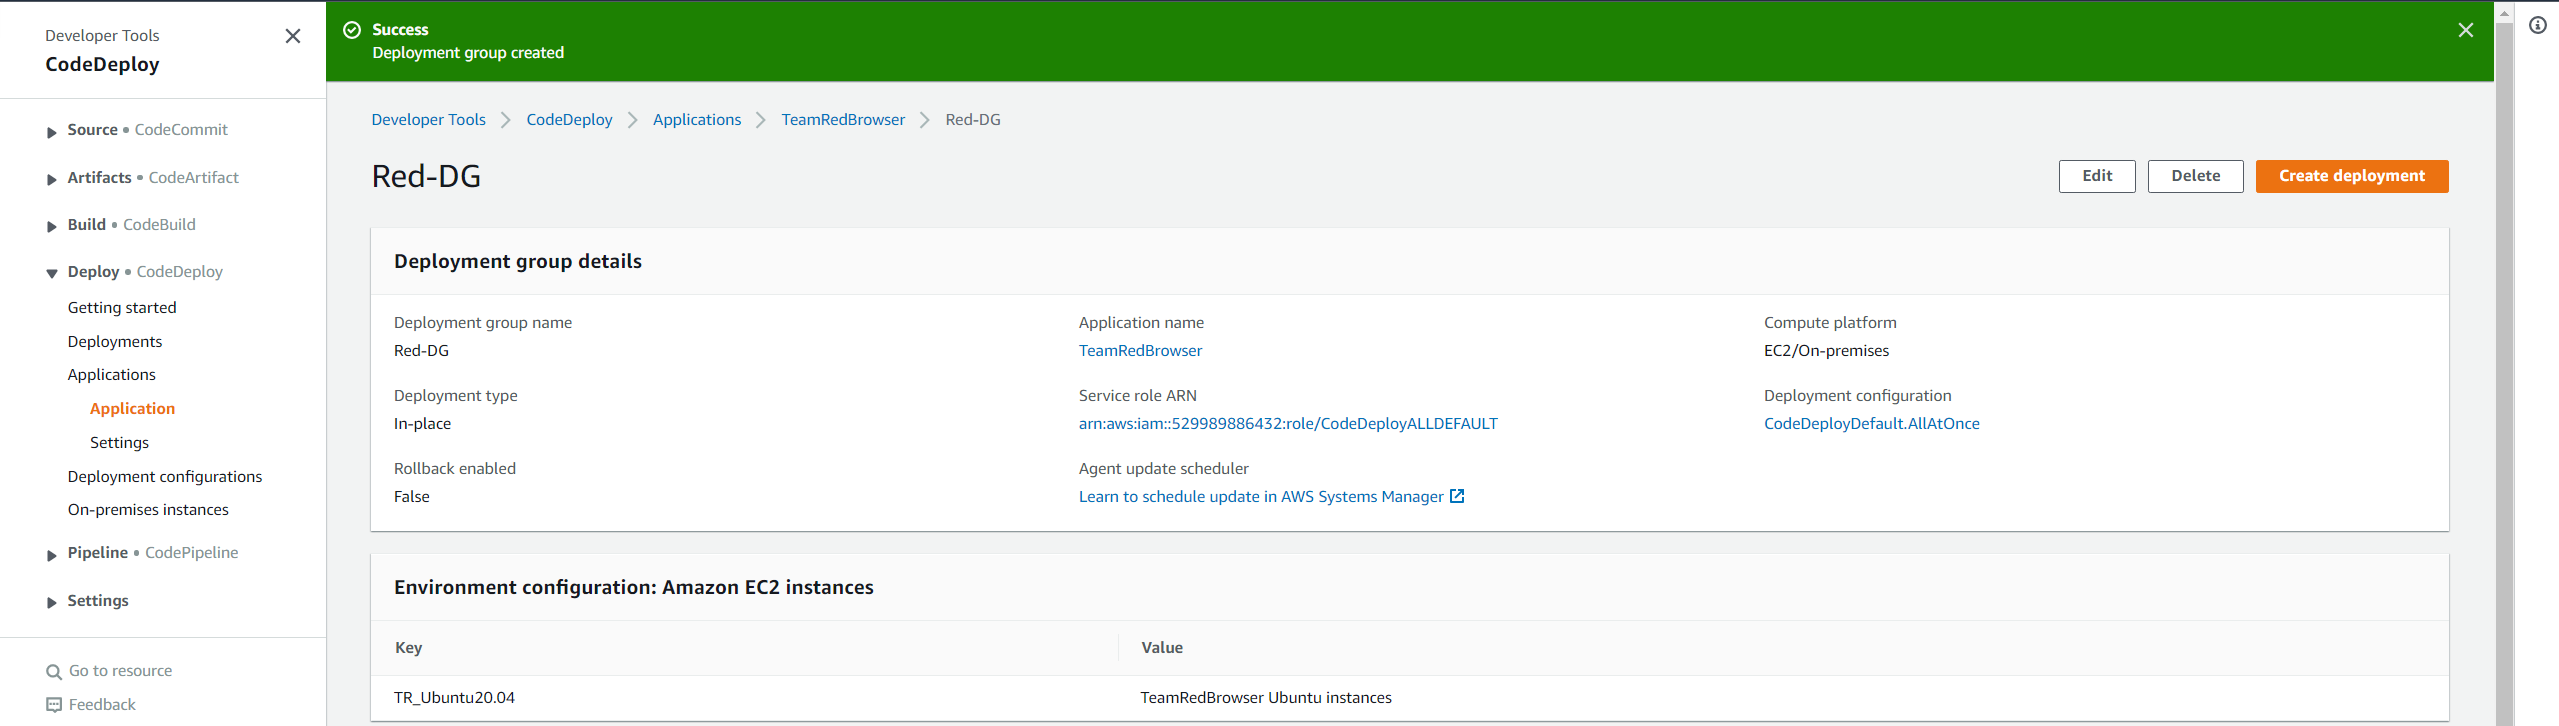
Connecting Your GitHub Account to CodeDeploy
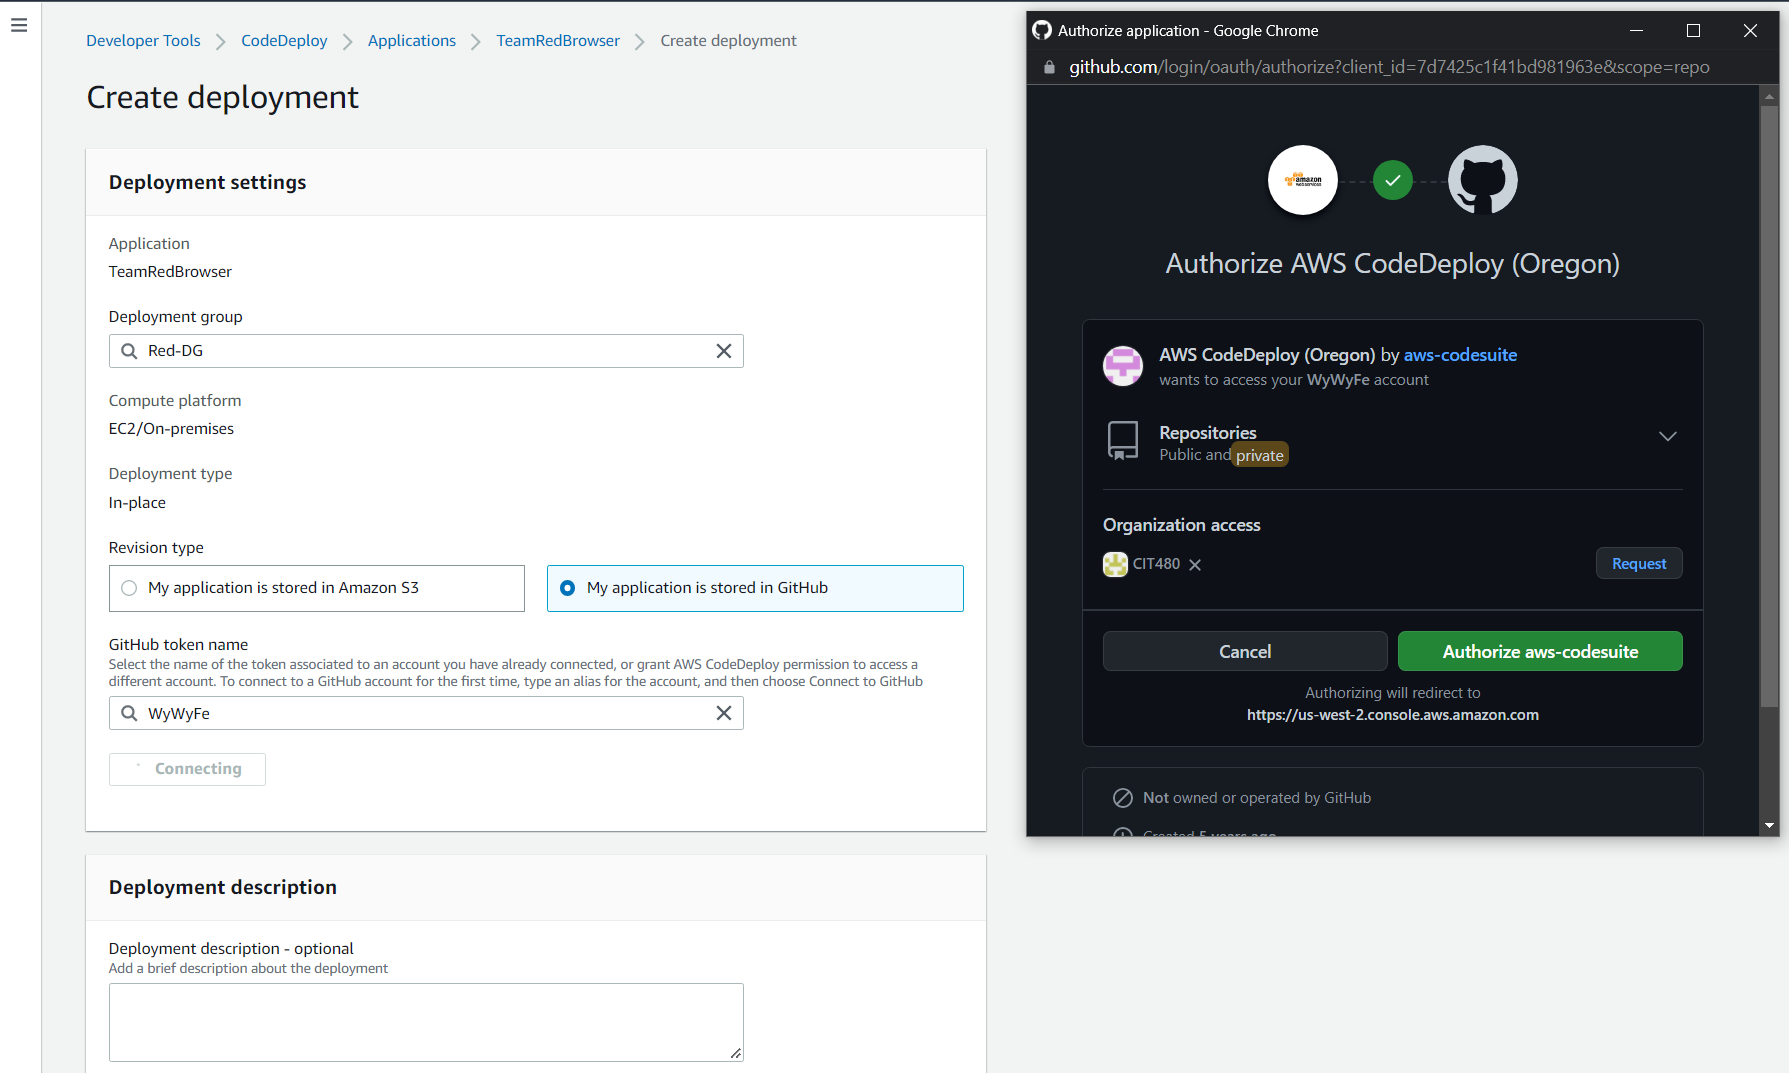
Assuming you have not created a deployment using an application stored in GitHub before, you must do so now. So, in order to do so, we must first view the Create Deployment screen, select My application is stored in GitHub, and then enter your desired GitHub token name (I named it WyWyFe) in the search bar below GitHub token name. It is worth noting that if you already have a GitHub token you want to use that has been correctly configured, then you should instead enter the name of that token you wish to use if it is already connected. That way you will not have to grant AWS CodeDeploy access to ALL of your repositories; however, for our purposes, connecting my GitHub account will be the quickest and easiest way to demonstrate the capabilities of CodeDeploy.
As shown below, after clicking Connect, a separate GitHub window will open asking if you want to authorize AWS CodeDeploy with the region you selected. After hitting the green authorize button, it will connect your CodeDeploy application to a GitHub token tied directly to your GitHub account.
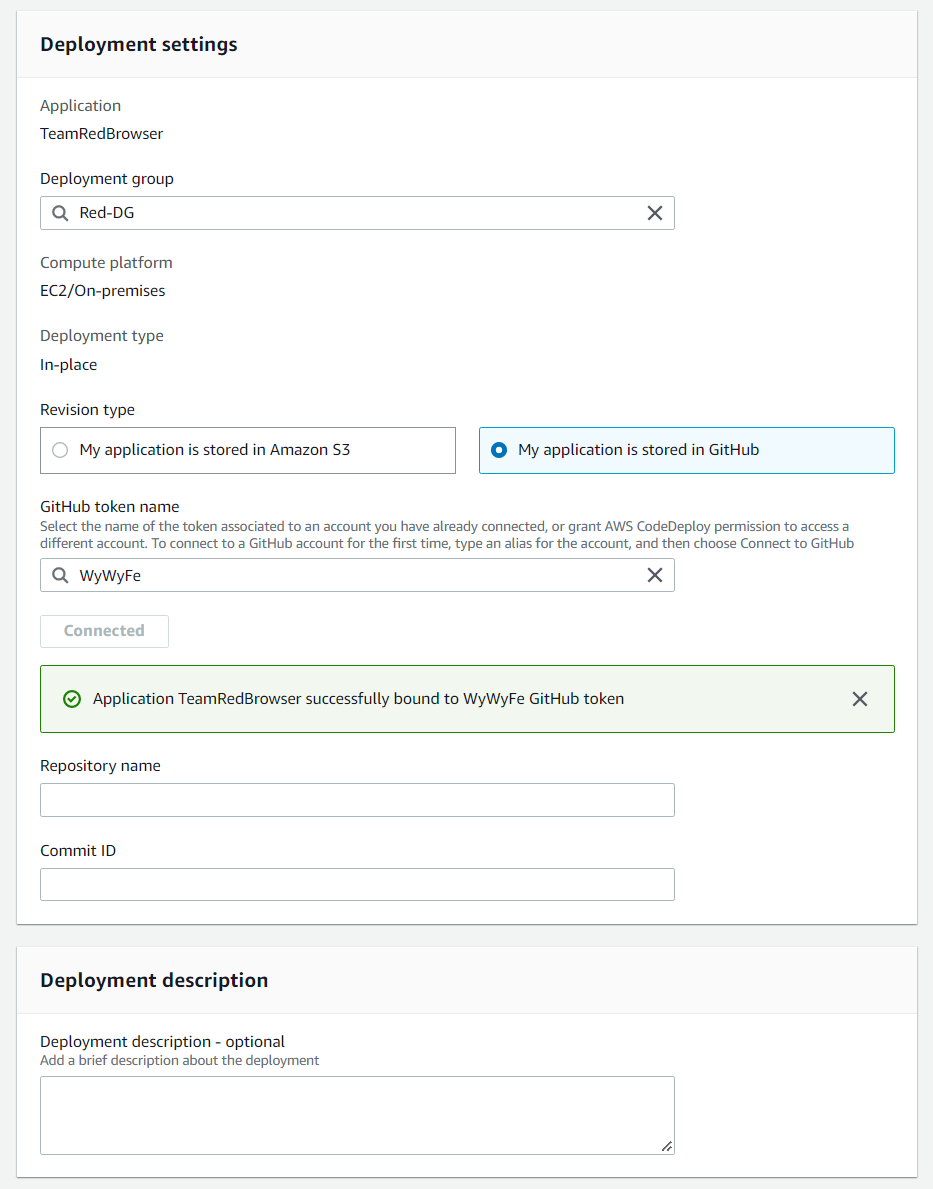
For security reasons, I left the Repository Name and Commit ID blank. Although it is unlikely that anyone viewing this blog will gain access to my GitHub account, I would rather not encourage such an act by exposing such information here! Sorry (not sorry!) But all you need to know about that, assuming you are using a private repository like I am, is to grab your repository’s name, and then grab the most up-to-date commit ID from your repository so that the files from your private repository can be adopted into your EC2 Instance.
Finally, let’s review the additional deployment behavior settings below. 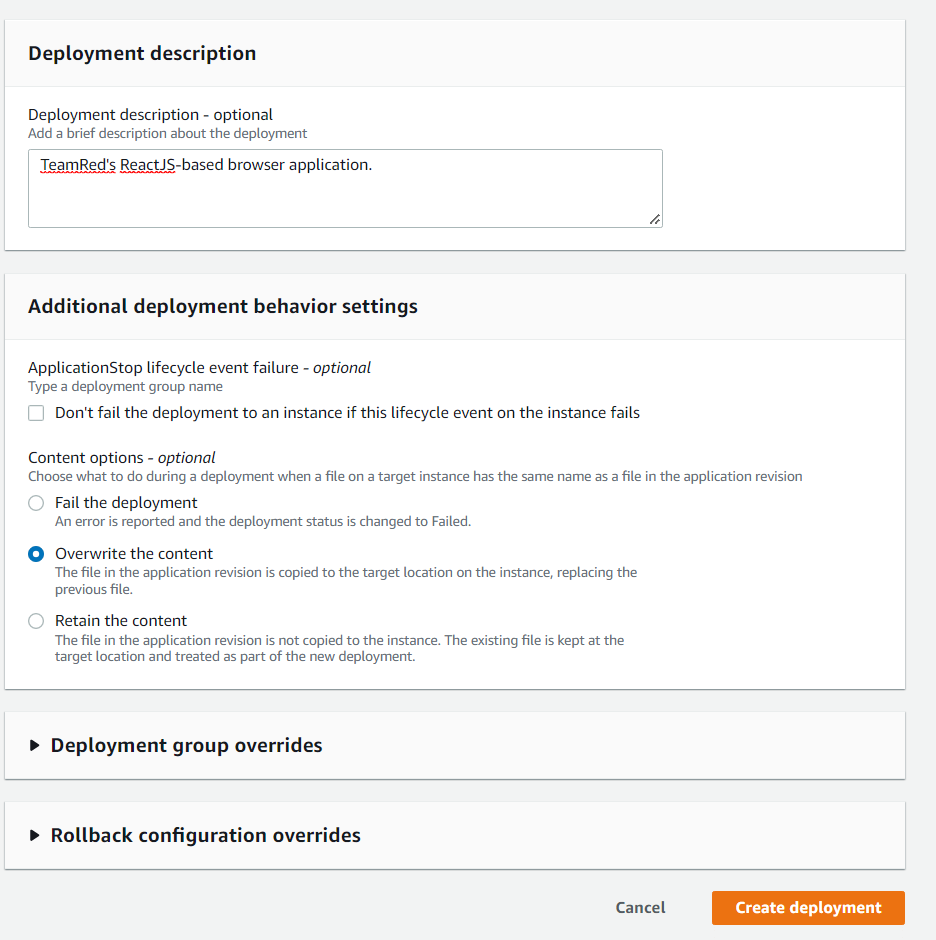
Since the goal of this continuous deployment method of instance upkeep is to incrementally update or change information in the instance as necessary, it is important that we choose to Overwrite the content. This option allows us to replace previous files with the new files from our GitHub repository if any changes are made. Out with the old, in with the new!
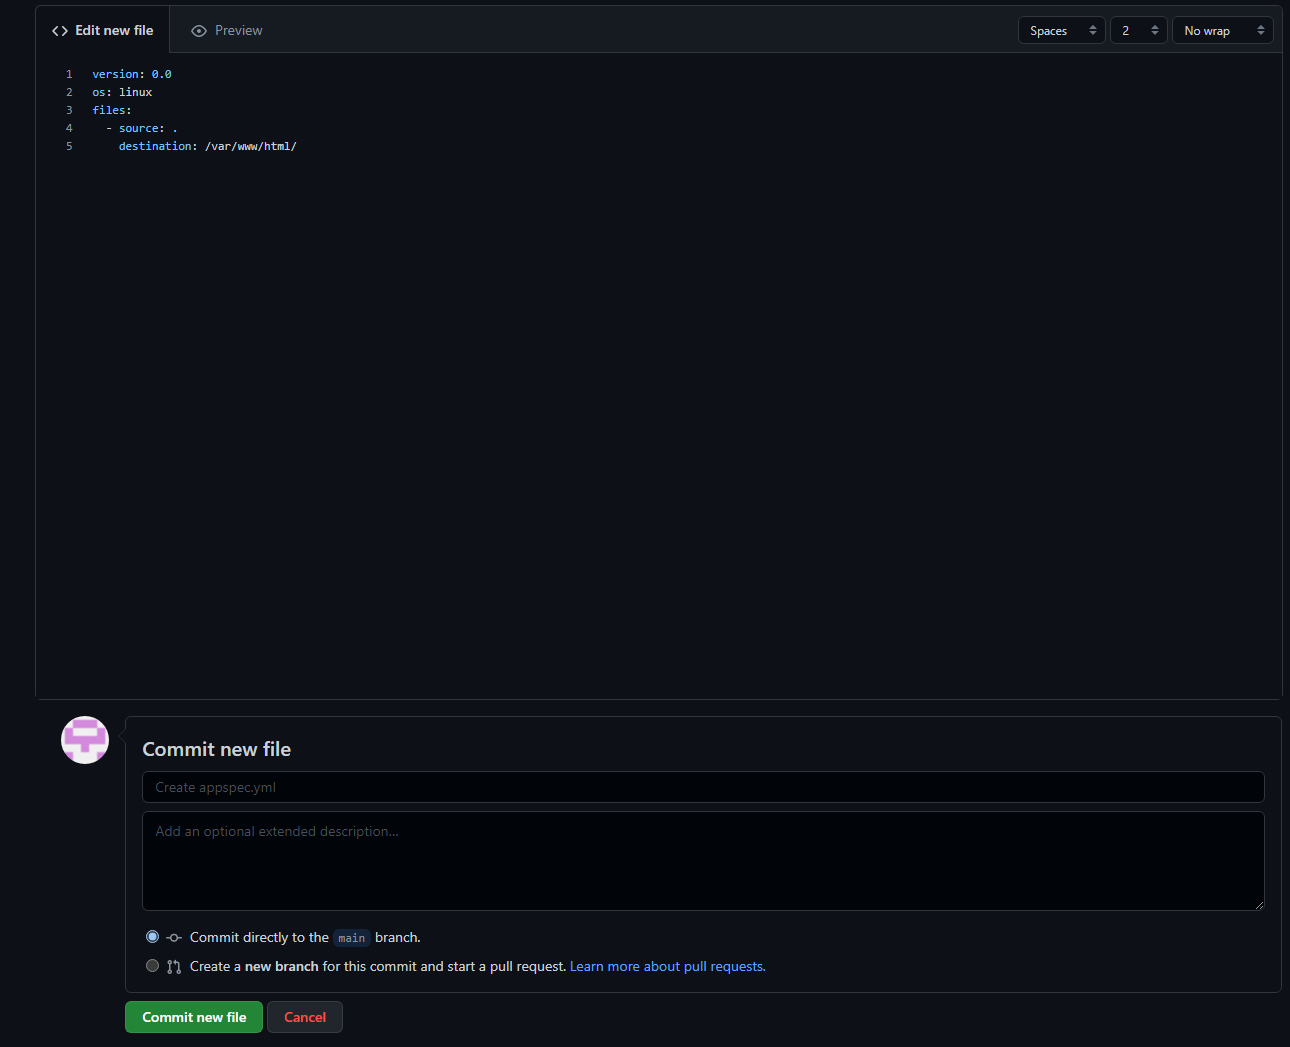
Although we are technically done with configuring the deployment group, we must now move to an equally important step: configuring an appspec.yml file within our GitHub repository.
AppSpec.yml File Creation and Usage
Before you click that tempting Create deployment buttom at the bottom of your deployment console in AWS, let’s make one thing clear: if you want to use CodeDeploy with an application stored within a GitHub repository, your GitHub repository will need to contain an appspec.yml file with the following block of code:
version: 0.0
os: linux
files:
- source: .
destination: /var/www/html/
This is important. Without even this basic text contained in a file labeled appspec.yml, CodeDeploy will not even allow the deployment to work.
Once you have commited the new appspec.yml file into your application’s GitHub repository, as shown below, you will be able to finally deploy using CodeDeploy.
Conclusion
There are of course many, MANY more nuances to the process of continuous integration and continuous deployment, but this is the very beginning of my explanation of how to interact with CodeDeploy using GitHub. I will continue this series in the near future and showcase what the EC2 Instance really looks like when it is functioning, but for now, I think this is a good stopping point, as this blog post has become exceptionally long. Until next time!