Introduction - How to Approach Learning HTML
If you’re like me, you don’t like to be told how to do things. However, learning HTML is entirely about learning the philosophy about how to do things. That doesn’t mean you won’t enjoy learning HTML - I surely do enjoy it. However, as I have taken the time to learn HTML, it has come to my attention that my fast and easy, “Try it and if it ain’t broke, don’t overcomplicate it” approach is essentially the wrong way to learn HTML.
Sidenote: I will be using https://glitch.com to interact with my code and showcase it visually.
So without further ado, let’s talk about why there is a RIGHT way to learn HTML and a WRONG way to learn HTML.
HTML, Hierarchy and You
Let’s be honest - if you started learning to code in a language like C++ or Java, concepts like memory management and writing your own functions instead of pulling them from the very convenient MATH library in order to optimize the speed of your program was the last thing you were worried about. And in HTML, that is still true for the most part. However, in HTML, although we USUALLY do not have to consider optimization of system resources too often, we DO need to consider the structure of our web pages. Generally speaking, creating websites is not hard. It is the accessibility management that becomes borderline tedious and monotonous. Let’s take a look at a basic website outline I have built, and I will develop it as this post continues. 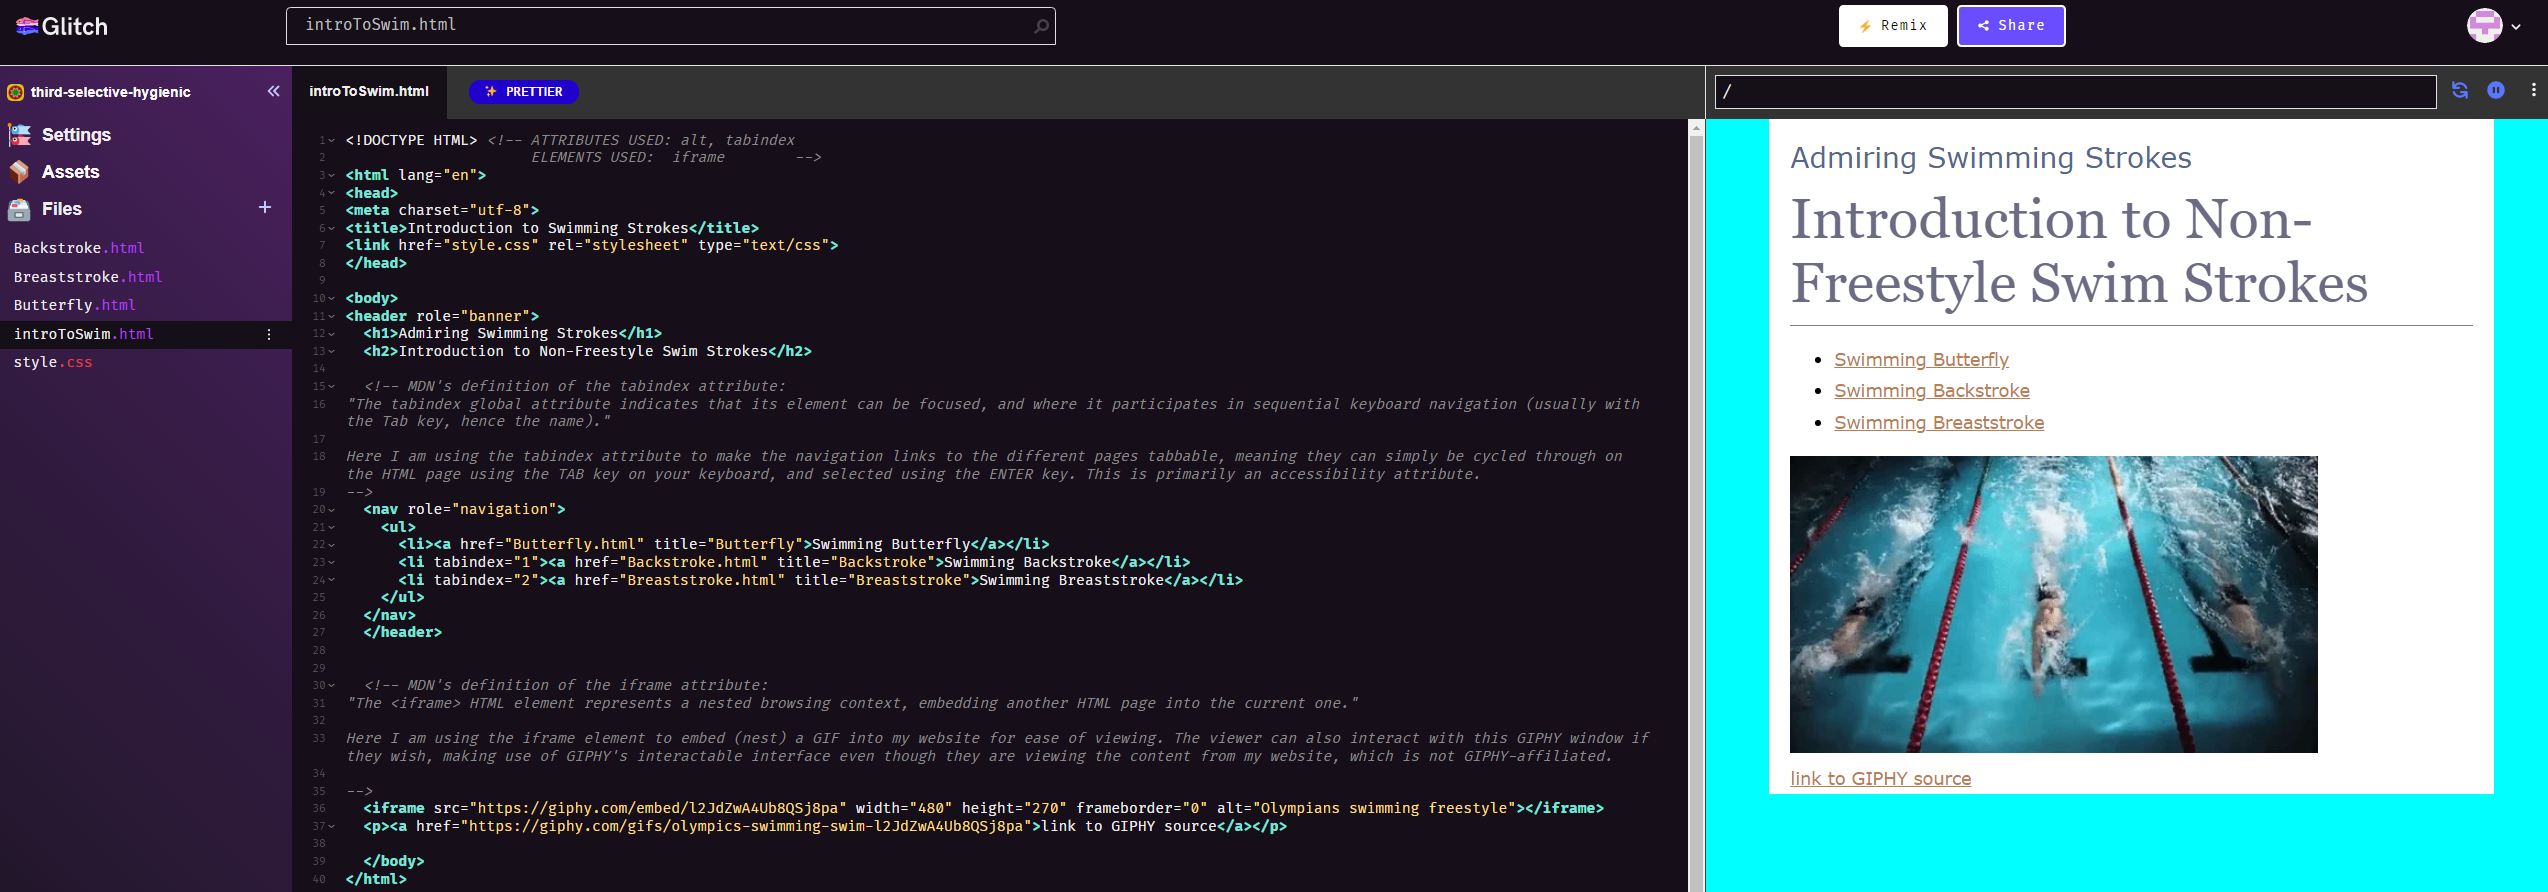
Even in just these 40 basic lines of HTML, there is a lot going on that needs to be explained. Nothing intense, granted, but let’s take it apart piece by piece.
The Head Element
There are a few basic elements (elements are anything in the < elementnamehere > syntax. ) such as html, head, meta, title, and link. Similarly to C++’s library imports, using namespace std, and int main{}, these are all pre-requisite chunks of code before you can begin adding your own content. All html-based code fits inside of the html tag, and beneath that is the head tag, which defines some crucial information about the standards of formatting your page. Anything inside the head tag, (here meta, title, and link) is basic formatting information.
The Meta Element and its Attribute
In the meta element, we specify the attribute charset is utf-8, which is generally the common standard that most, if not all modern websites built in html use. (attributes are essentially things that modify elements that appear inside the angled brackets).
The Title Element
The title of the page, in this case “Introduction to HTML,” is the name that users will see on their browser tab when opening said HTML page.
The Link Element
Finally, there is the link element that, as it implies, links external resources (such as our CSS stylesheet which can be seen on the left files bar) back to the page that you are coding on. This makes it possible to use one common CSS stylesheet to format an entire website, since you can simply copy-paste this link element to all pages to ensure that all websites format is consistent across all pages.
So, if CSS handles most of our formatting for us, then we don’t need to worry about formatting our text for our web pages, right? Technically you are correct, but if you want CSS to have any level of flexibility with styling or you want to make your website truly custom, you need to wrap everything in relevant tags. And then, there’s accessibility optimization, which is the main showcase / tutorial point of this blog post.
Accessibility and How to Implement it
Take a closer look at the attributes (the values inside of the elements) on the first screenshot under the body element, back near the top of this blog post. Notice how header, nav, and some of nav’s list items have attributes that specify further detail? Technically speaking, none of that is necessary. The website would still display the desired text and images, but there is a lot that goes on behind the scenes in website development. Sure, our website would look fine, but we want text reader bots that read sections of pages for the blind or hard-of-sight people of the world to be able to interact with our web pages. It is for this reason that roles and other lesser-known attributes are needed to increase interactibility, and thus accessibility, with our page. And, spoiler: the picture of the web page above is still incorrectly formatted! Think about what might be missing from the iframe tag at the bottom of this html code as you read the sections below. Hint: the iframe content is supposed to be the start of the main content of our fictional website!
Accessibility - the tabindex attribute
For starters, I have wrapped the unordered list < ul > element’s list items in a nav element, with a role attribute of navigation. For accessibility reasons, the use of this nav tag indicates to potential web crawlers (basically bots that scour the internet for websites that essentially judge the formatting quality of said website) that this block of code is used for navigating the site.
Already, you can see how we have essentially chopped up a piece of our website’s code to be more user friendly. Although this changes nothing visually about how our website looks, it massively increases the ability of web crawlers to understand how our site should be read/interpreted, and where a user needs to go in order to reach navigation links to travel to other parts of the site.
Moving on to dissecting the list items ( < li > ), you will notice that the second list item, titled Backstroke, has a tabindex of 1. This actually does change the way that the user can interact with the website. Suppose a user wants to only use their keyboard, since they prefer navigating websites using their mouse. (keyboards existed long before mice, fun fact young ones!)
In that case, using tabindex to allow that user to jump to relevant INTERACTIVE elements of our website is essential! The keyboard enthusiast can now use their tab key to cycle through content in the order that you, the web developer, has deemed is appropriate. In this example, the first press of the tab key on this website highlights first the butterfly list item, then the backstroke list item, then finally the breaststroke list item. If the user presses the return key, they can quickly and easily activate whatever interactable element you implemented - in this case, pressing return would jump the user to the page they have selected.
The Big Reveal - What’s Wrong With the First Screenshot?
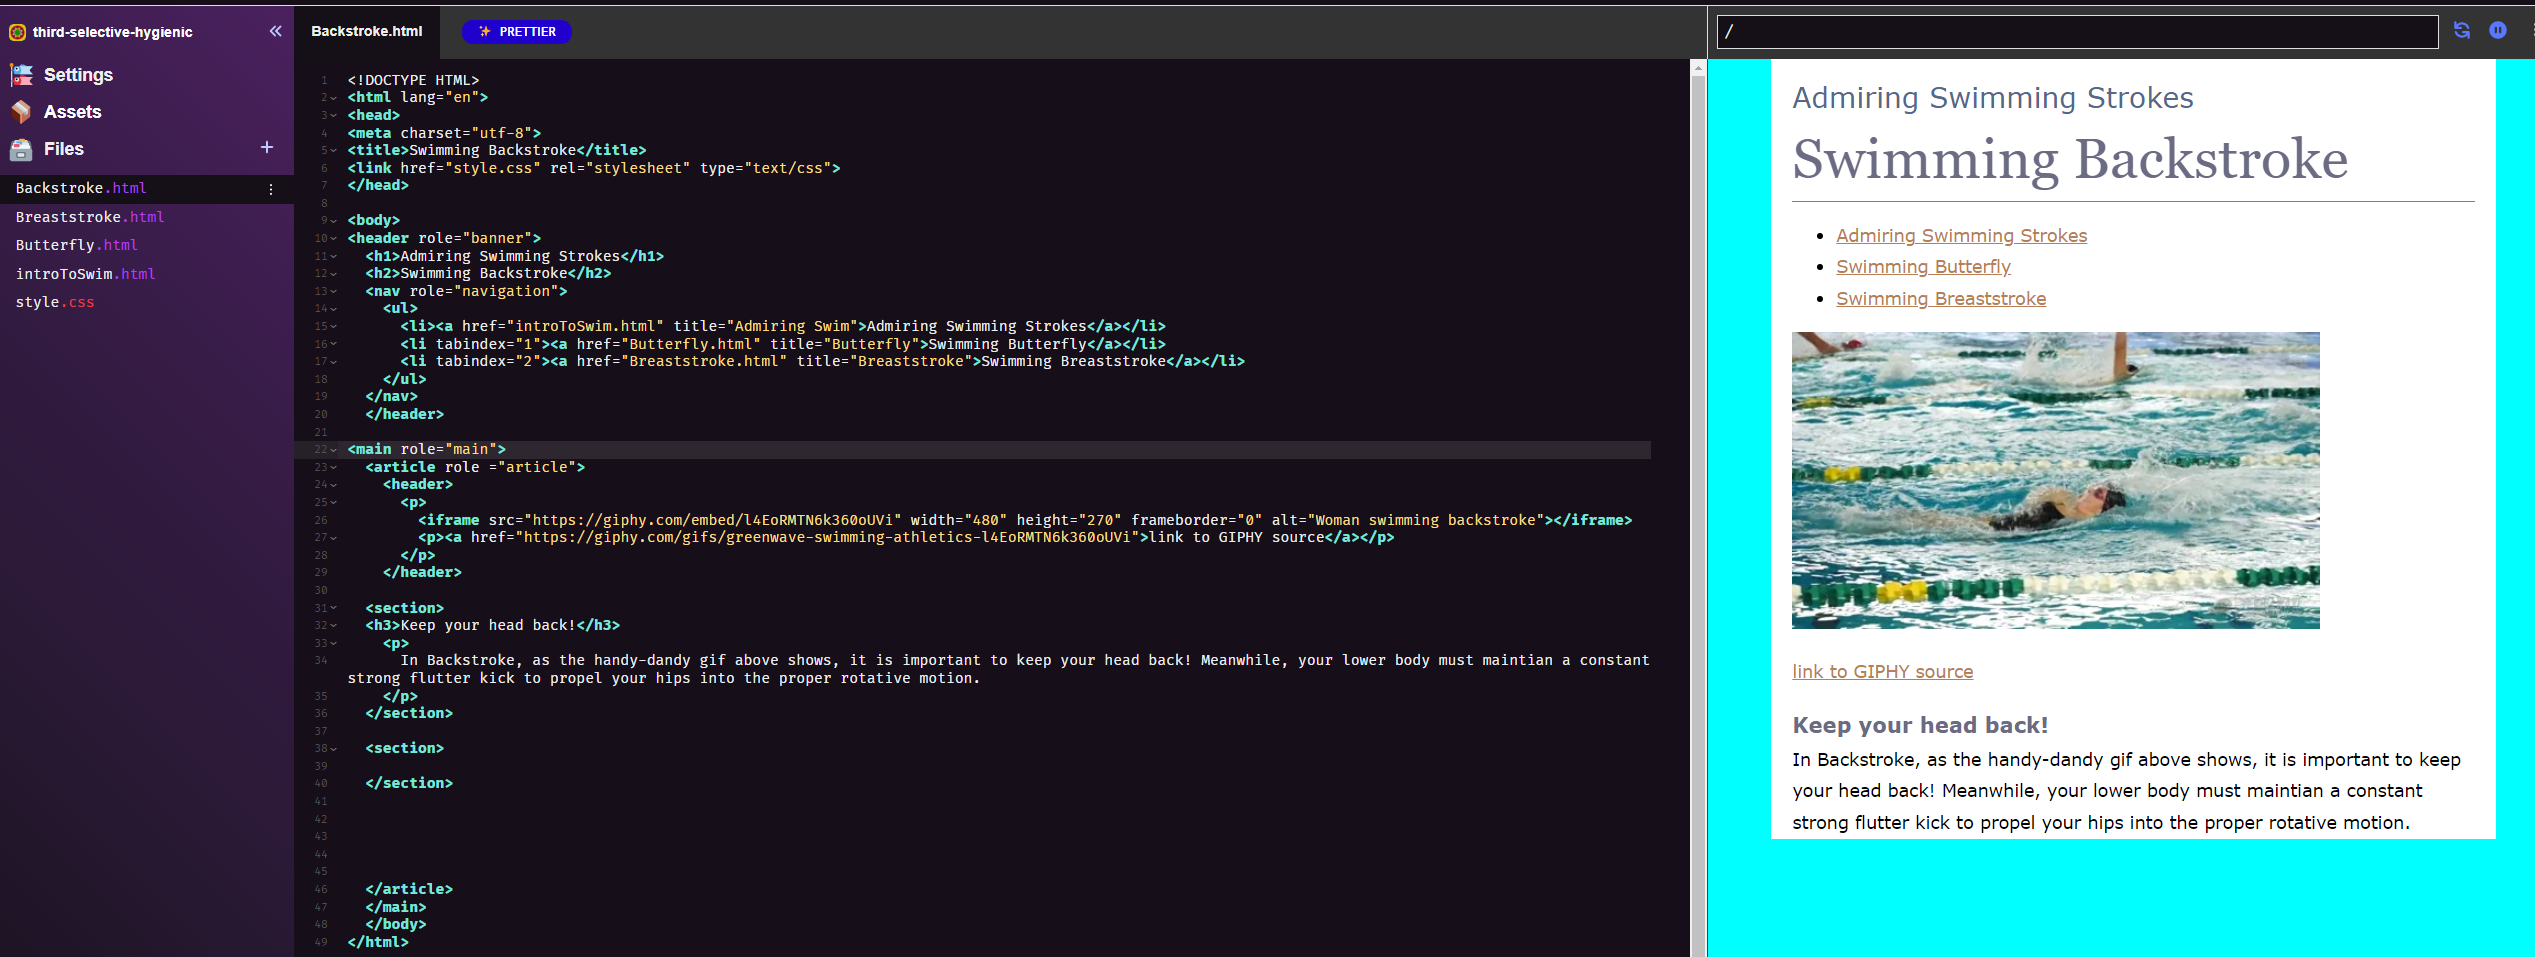
Take a look at this screenshot of the more correctly formatted Backstroke.html page. Compare this to the previous introToSwim.html page. Besides the change of the links in the navigation bar and the picture displayed, not much has changed has it? Well, you’re technically correct, but really what was missing from the previous image was the use of the following formatting elements: main, article, header, and the p element (paragraph).
By dividing the content of this page up into content that is considered “main,” we are indicating to web crawlers that anything outside of the main text, and that further sections that we create, such as the footer, are of less importance and do not contain any of the “meat” of our article. Speaking of articles, by tagging our content with article and giving the first image the element “header” wrapped around the iframe, we are indicating that a summary of the sections (I.E. the most important part semantically for our whole article) is this image wrapped in the paragraph text.
Wrapping Up
Hopefully this post helped you understand why formatting is important. Now, if you do not care about the popularity and/or accessibility of your site, by all means, ignore these tags and just wrap everything in one big paragraph tag. (please don’t, that’s a joke!) There are quicker and easier methods of creating websites while still using html, such as React, but that is a discussion for another time. For now, if your main goal is to get really good at HTML, you had best start off with using and understanding semantic rules. Without them, your HTML code will seriously lack functionality.
Fortunately, HTML is quite fun and the Mozilla Developer Network (MDN) is extremely helpful with visual code examples and descriptions for you to follow along with. So this process, at least for me, has not felt at all like a slog. Happy coding!