Setting up VPCs with Public and Private Subnets
Jumping right into things, in the VPC section, go to Your VPCs and click the orange Create VPC button in the upper right hand corner. You will be taken to a screen that details your VPC. You can see below that I have configured this according to my needs - I use a subnet of /16 here so that we can use /24 for the subsequent private and public subnets, of which I will create 2 of each. We will keep the default values for the rest of this, aside from the name, which can be whatever you like. 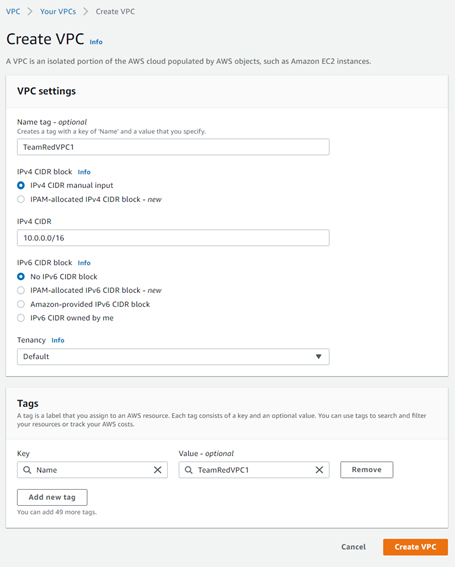
We will now attach an Internet Gateway to this VPC. Return to the main page of VPC, and then go to Internet Gateways > Attach to VPC and we will select the VPC we just created above, then attach the internet gateway. 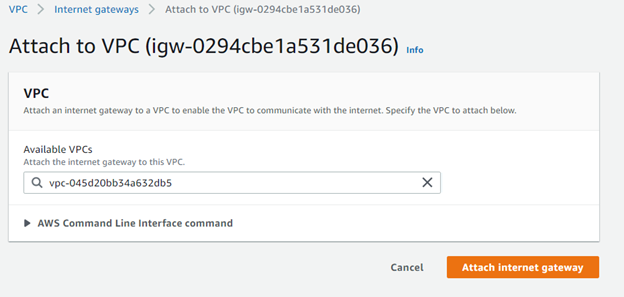
In the same section after you attach the internet gateway, we will now create subnets through the directory of VPC > Subnets > Create Subnet. We will need to select the VPC ID from the dropdown list, which thankfully is named as shown in the previous step as TeamRedVPC1. This is where we will begin to create subnets. It is important to note that you should always name your subnets to differentiate them in a sensible matter, so the first one I will illustrate is a public subnet that is operating on Availability Zone (AZ) us-west-1b.
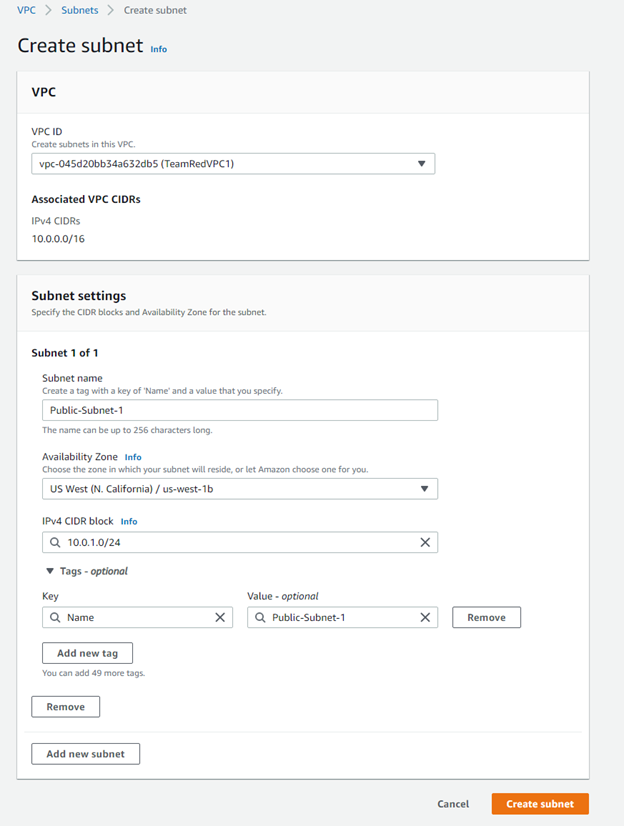
Note that our IPv4 CIDR block’s netmask is /24, which is larger than the initial /16 we used to create our VPC. For subnets, the point is to create more addresses, which might be a redundant fact to state, but it is nevertheless necessary to remember, as when creating subnets, you must always fall within your VPC’s addressable range, but slightly change the address block to be appropriate for that subnet.
For the above example, which is our public subnet, we named it Public-Subnet-1, and the only differences for the subsequent private subnets is that we will change the CIDR block and the subnet name to be appropriately different. 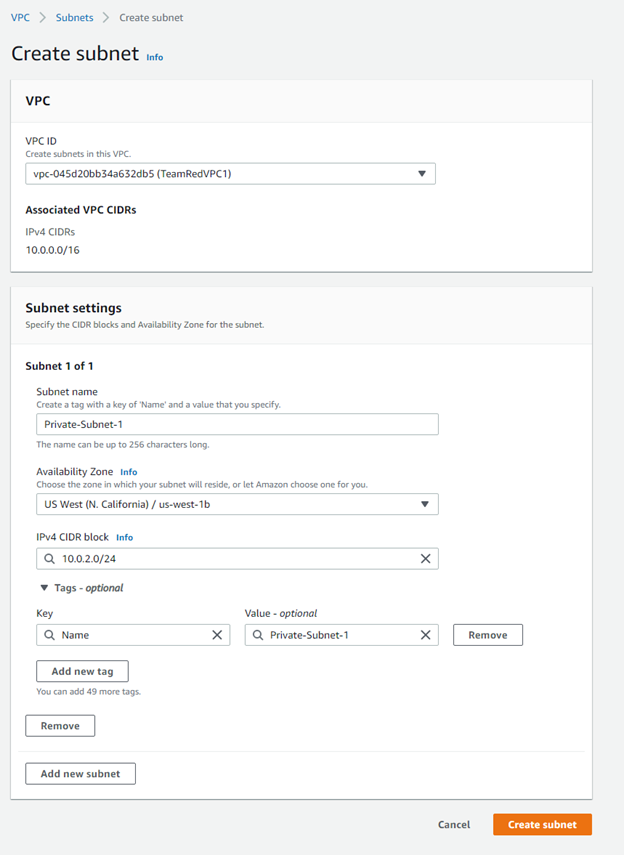
Here is an overview of our subnets listed plainly for us to see. 
Assigning Route Tables
Now that we have subnets, we must create a Route Table to house these subnets in. We will create routing tables of the same naming scheme as the subnet naming scheme. The Route Tables section is also located in the VPC section of the AWS Management Console, so no need to go anywhere else. Click Create route table, select the same VPC you have been working with, and give the routing table a name - either somethign to do with public, or private. Once you have created a route, click the Edit Route option, and from here we will select Internet Gateway as shown. 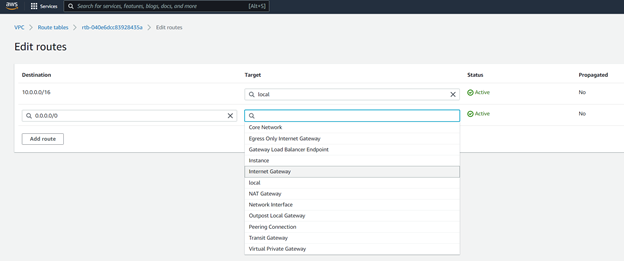
There should be only one internet gateway if you also are following along, but if not, make sure your VPC’s internet gateway you selected is the right one! Moving on now however, take a look at the Subnet Associations tab also in the table you’ve been modifying. Select Edit subnet associations and add the public subnets to this routing table so that there is a physical link between the two now. 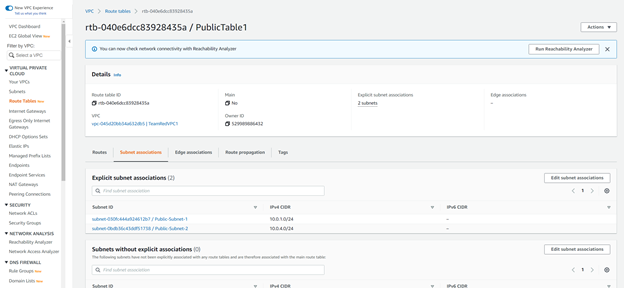
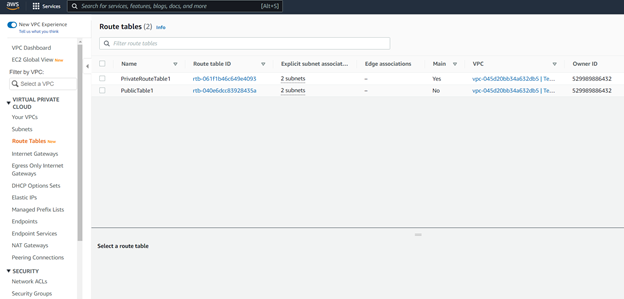
In the above pictures we can now see that I have setup two route tables - one for private subnets and one for public ones. Voila! Simple as that.
Creating EC2 Instances That Utilize These Techniques
The whole point of all of this was of course to create an EC2 instance that can utilize these VPC configuration techniques. After choosing an AMI appropriate for your usecase, examine this picture of our instance. 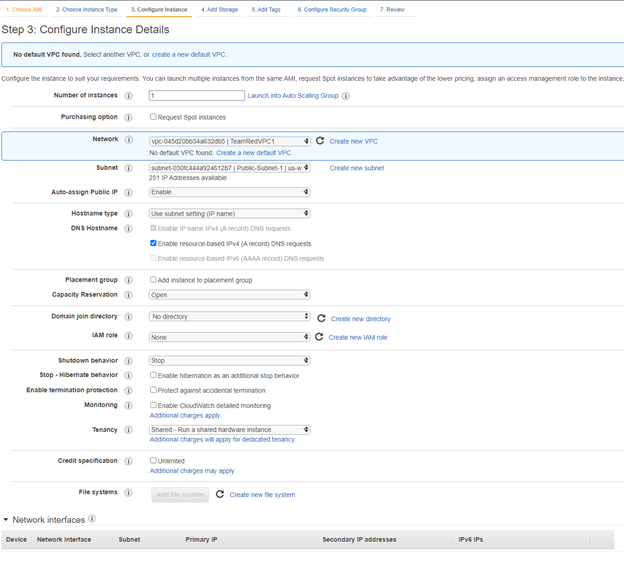
We have selected our VPC so that the instance resides inside our VPC TeamRedVPC1’s network, we chose a Routing Table of Public-Subnet-1 that contains our public subnets, and we enabled auto-assign Public IP so that we do not have to configure this ourselves. Eventually, if we host a website on this instance, we will of course have to utilize Elastic IP Addresses, but that is a subject to cover another day. Happy Clouding!