Before We Begin…
This tutorial assumes that you have access to an AWS account, can create EC2 instances through it, and that you know how to SSH into an EC2 instance. For the sake of simplicity as well as for the fact that I simply do not know how to do it yet, I will be holding off on creating a blog post for how to do this automatically using Ansible until a future time. That blog will come one day, however!
The goal of this guide is to illustrate how to install a LAMP stack on an existing EC2 instance on an Amazon Linux 2 AMI.
Installing a LAMP Stack on an EC2 Instance
Okay, so you’ve established an SSH connection to your EC2 Instance. in my case, since I am using a learner lab account that has free credit, I will be restricted to using the Amazon Linux instance type. However, if you prefer Ubuntu or CentOS or some other distribution of Linux, feel free to use that! Just be aware that the commands for installing modules may differ. That is the only real difference. For example, in Ubuntu you use Apt to install things, while on other distributions, they use the Yum module. Yum is what I will be using here.
Use sudo su to become the root user. We will be using this to update and download various things without need for heightened permissions. Perform a yum update just in case the instance is out of date with anything (it usually isn’t, AWS keeps their instances up to date.) And look, it’ll even tell you that there are no packages to update
As a reminder, LAMP stands for Linux, Apache, MySQL, and PHP. Guess what? You already have the Linux part down! Congrats!
On a more serious note, let’s install Apache. yum -y install httpd is all we need for Apache to be installed. HTTPD stands for Hypertext Transfer Protocol Daemon. Not like that means much, just thought it was worth sharing. Another important side note: when using yum, if you do not care to accept the prompts, just use the -y option to accept (say yes to) all the user prompts.
Installing mySQL involves installing mariaDB. On Linux, instead of mySQL for database servers, I will use MariaDB. MariaDB offers improved speed over mySQL in numerous ways, and is my preferred database manager. To install it alongside its server, use yum -y install mariadb mariadb-server.
To install PHP, I will be using yum -y install php php-mysql. But, Mr. Earp, you might say. We were supposed to only be using MariaDB! Yes, but even MariaDB uses some modules from MySQL. So, there. Matter settled!
Setting up your Services
Let’s begin by listing all the php modules present we now have installed on the instance. To accomplish this, I will use yum search php. This is the result. 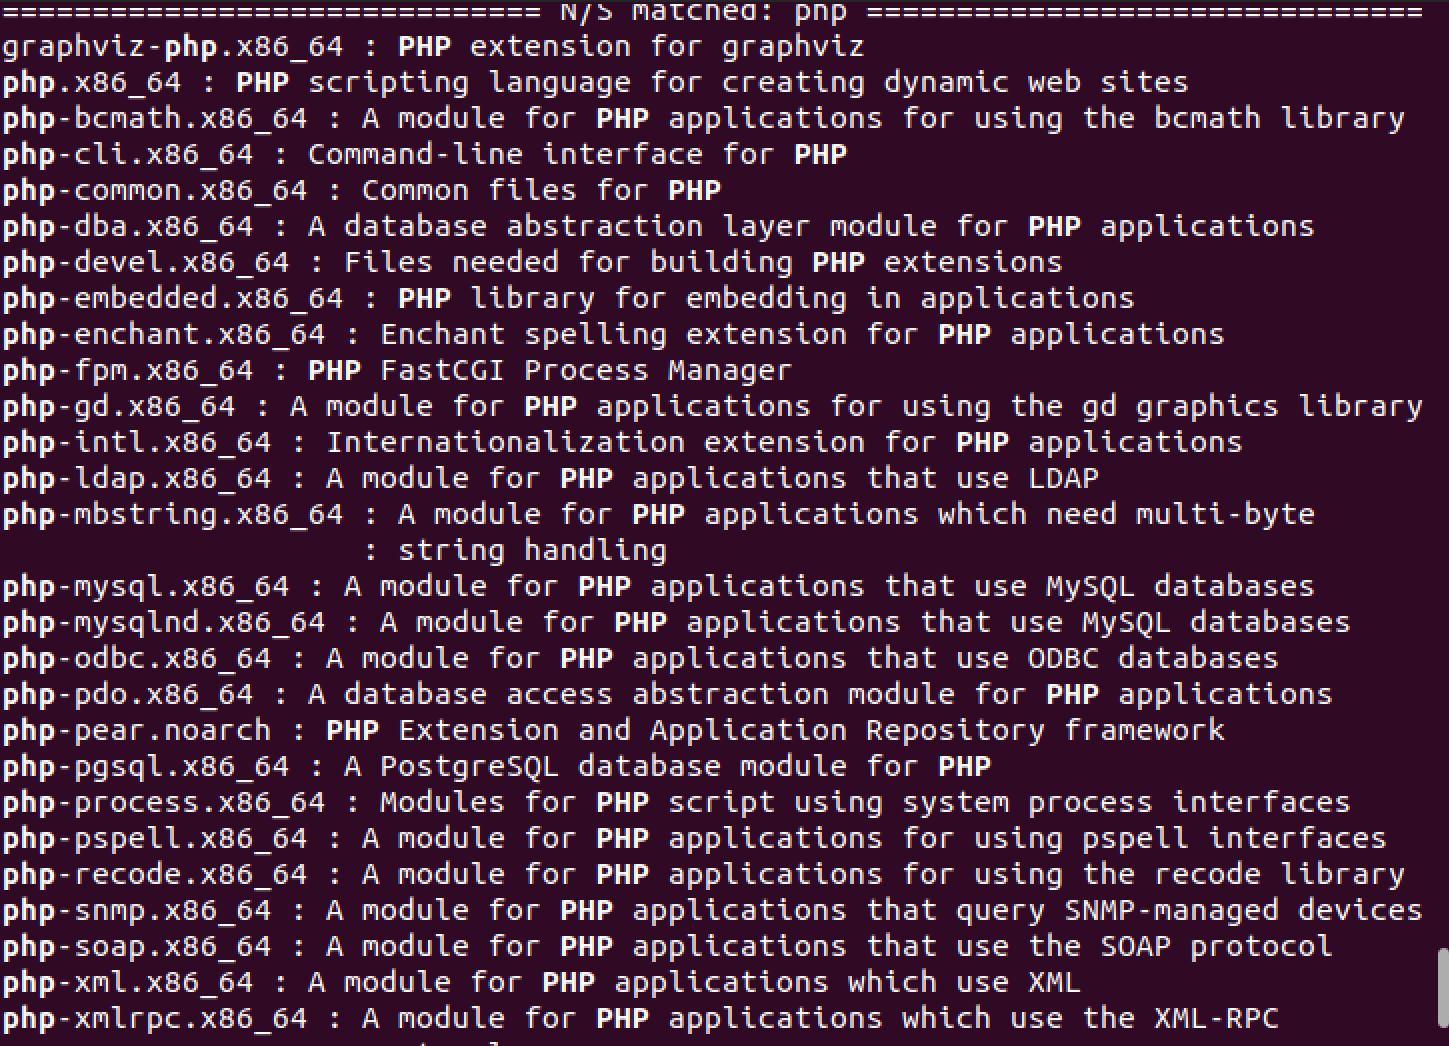
We now want to actually start mySQL, or in our case, MariaDB. To start services on a non-ubuntu system, we use systemctl. I typed systemctl start mariadb; systemctl enable mariadb.
To start MariaDB, we will use mysql_secure_installation and press the enter key when prompted for a password, since we have not created one. Set a root password at the prompt by pressing Y and remove annonymous users, disallow remote root login, remove test databases, and reload privilege tables to give us a nice, clean, blank slate. 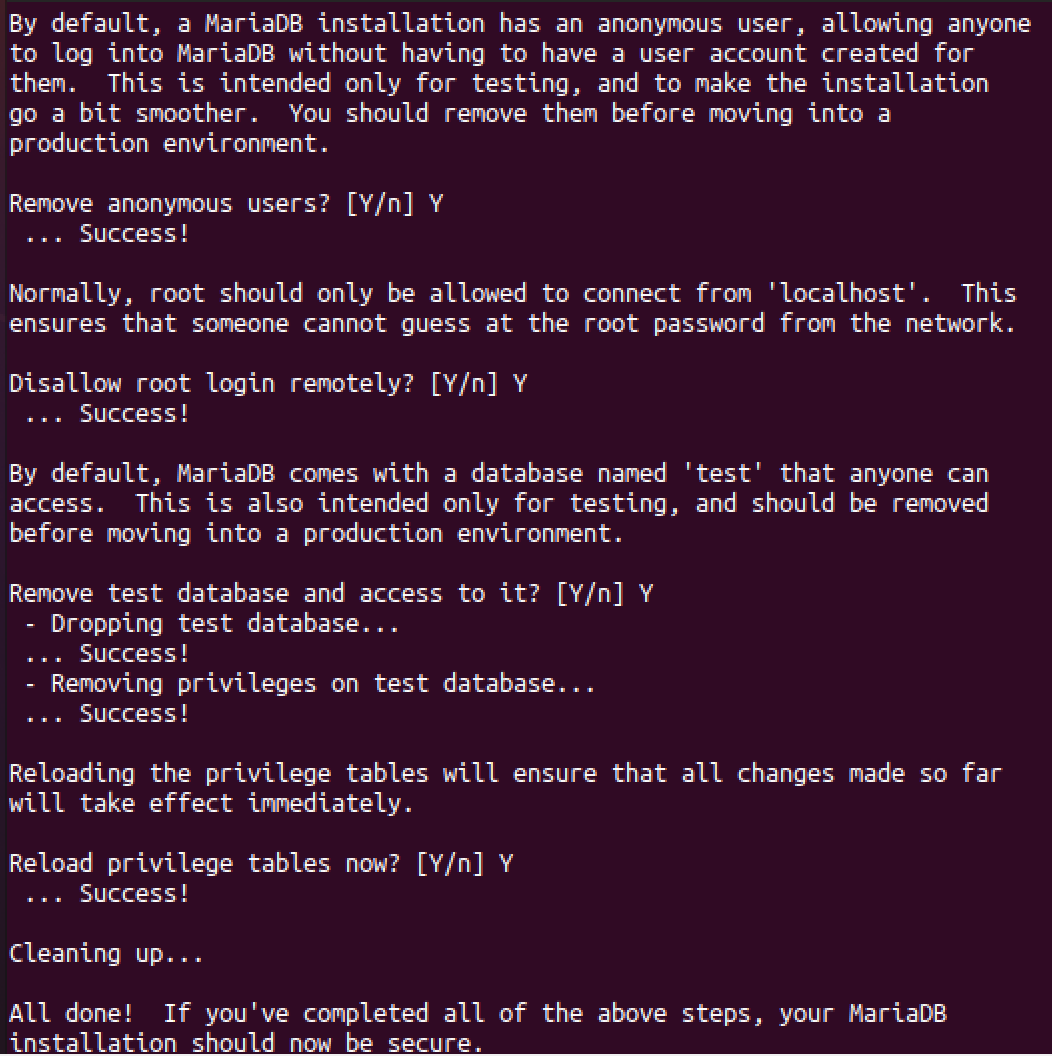
To start and enable Apache, use systemctl start httpd; systemctl enable httpd. Once this completes, we will cd into the /var/www/html/ directory, as this is where we will put any and all of your website content. Any and all HTML or other website content you can put in this directory, as it is essentially the default directory for such content.
In the /var/www/html directory, we will create a text php file called index.php to showcase that this website works and can serve php content. I used touch index.php; vi index.php to make this happen.
In index.php, type the following so that we can call on the php function phpinfo to show us the php info we have when we visit the ec2 public address. 
Now, go back to your AWS Console. It is worth noting here that if you did not open your EC2 instance to HTTP traffic, you will not be able to reach your website. But if you did, go to your instance and copy the public IPV4 address. Paste it into your web browser of choice and voila, you should get something that looks like this. 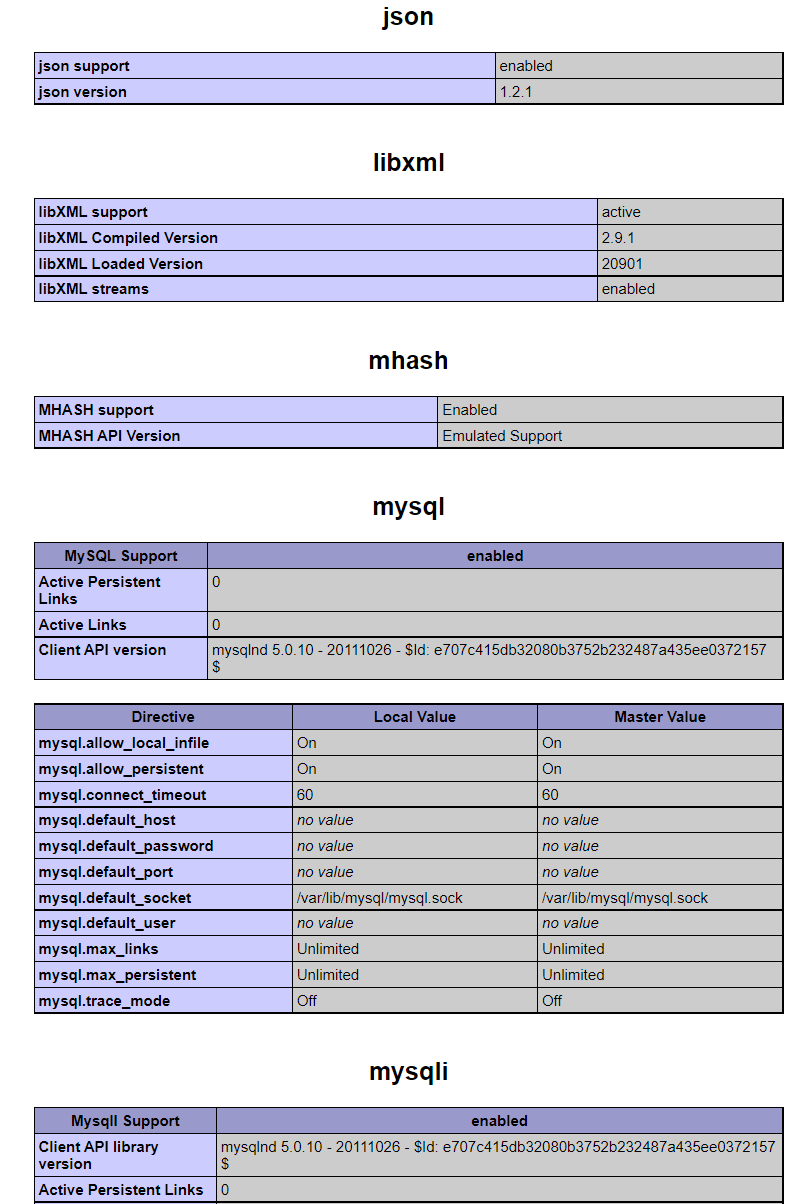
See how mysql shows up in the list? It means that we successfully connected our php and the mysql services we installed and enabled on the EC2 instance! Congratulations! You’ve just seen the creation of a beautiful LAMP stack. Feel inspired? I feel inspired. Awesome.
Next time, I will showcase how to serve a ReactJS-based website on this LAMP stack. Stay tuned until then!