Creating Dynamic Backdrops Using JS
Before we begin: this post relies on information covered in the previous blog, so click here if you want a brief intro to see what kind of filesystem we’re working with!
Here’s a small update on what I have changed since the last ReactJS blog post. I implemented a CSS file to further style the web page like so: 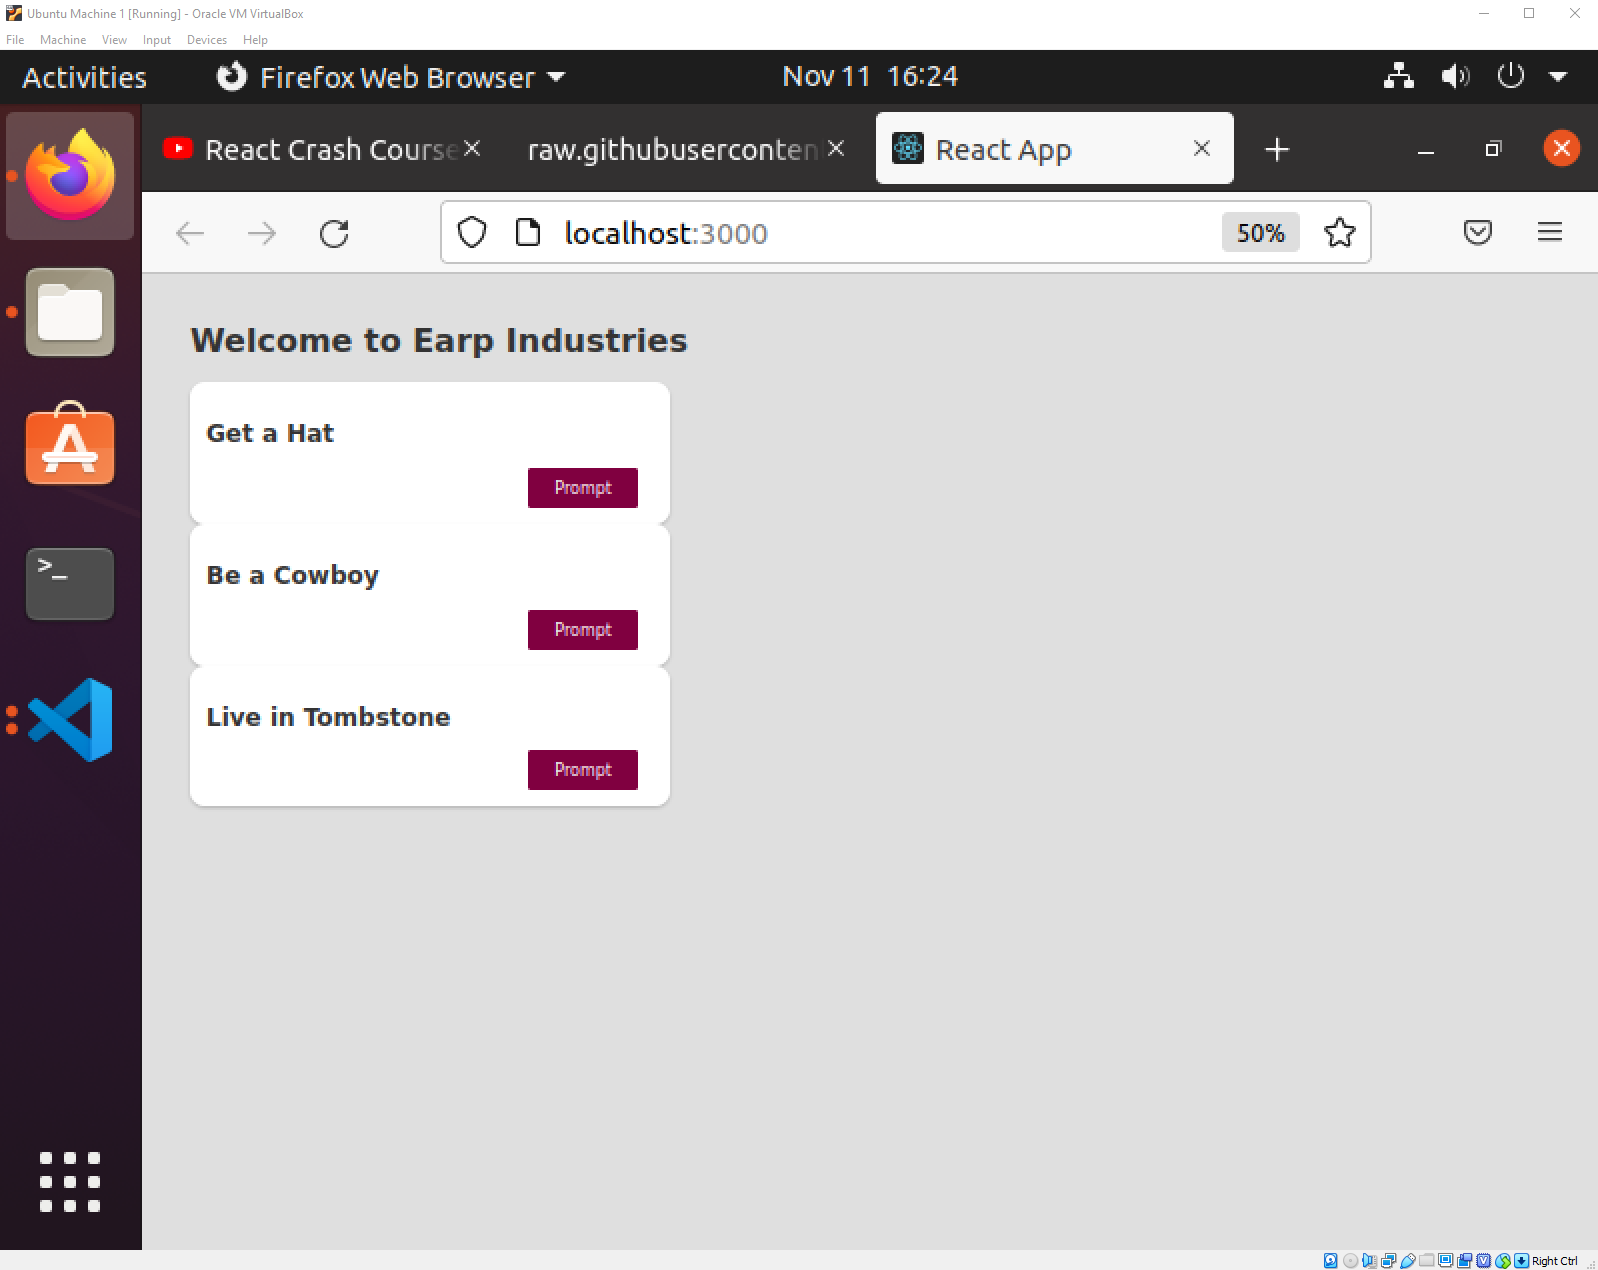
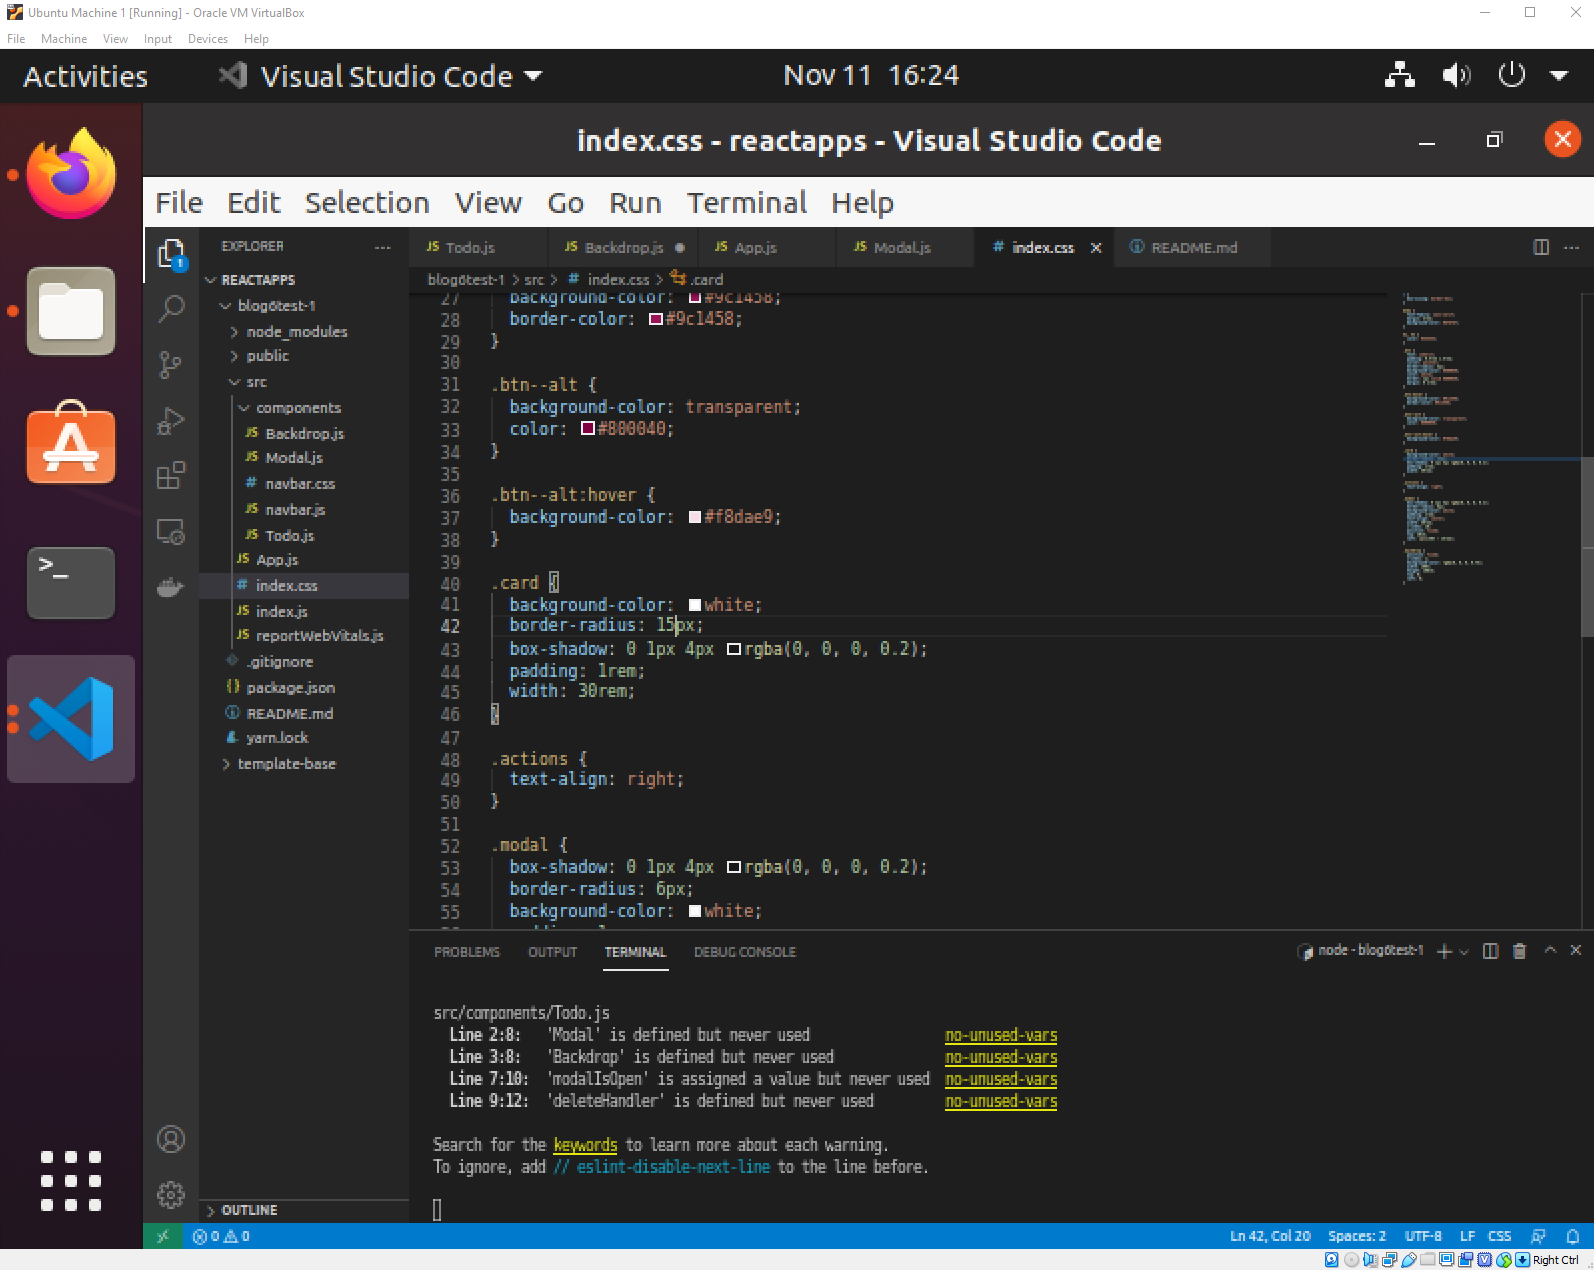
You may notice something in the file explorer pane - two new components called Backdrop.js and Modal.js. (and of course the index.css style file in SRC, but that is showcased in the above picture.) Notice we make frequent use of JS’s className feature.
These new files are what we will be using to deal with this concept of state. Ever clicked an element on a website and have a popup that you can’t click away from suddenly appear? That is essentially a concept of state. At any given time, your website may need to display overlays over your website (a Modal). Let’s take a look at the structure of my Modal.js file. Keep in mind, this will be rendered by the browser - consider it just another component we can plug into App.js. 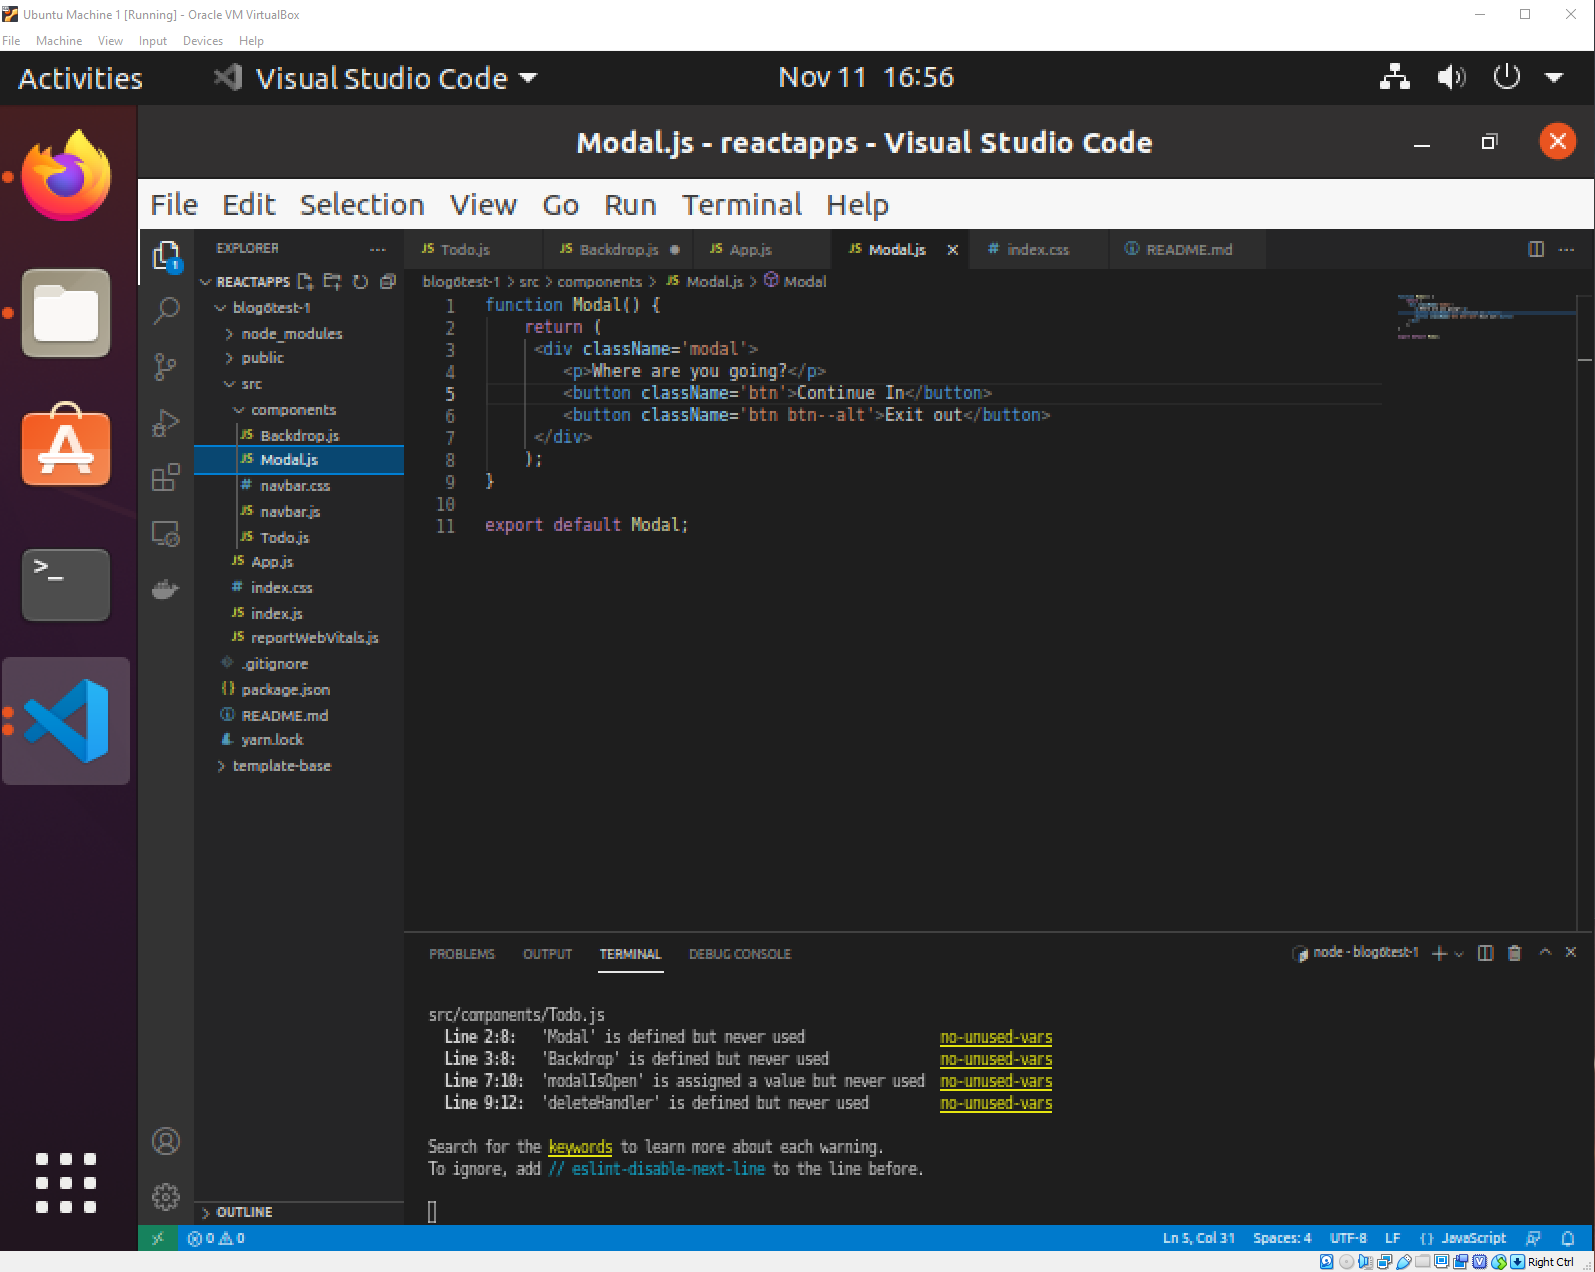
This Modal.js file is essentially a basic template presenting the user with the option to continue with whatever action prompted the modal to pop up (i.e you call Modal.js in the app.js file), or to “exit out”
In any case, we need the backdrop to appear to make it clear that the screen behind the Modal popup is unreachable, but we only want the modal to pop up if we click the prompt button. This is where the concept of state comes into play.
State in our Todo.js File
Let’s go to our todo.js file. 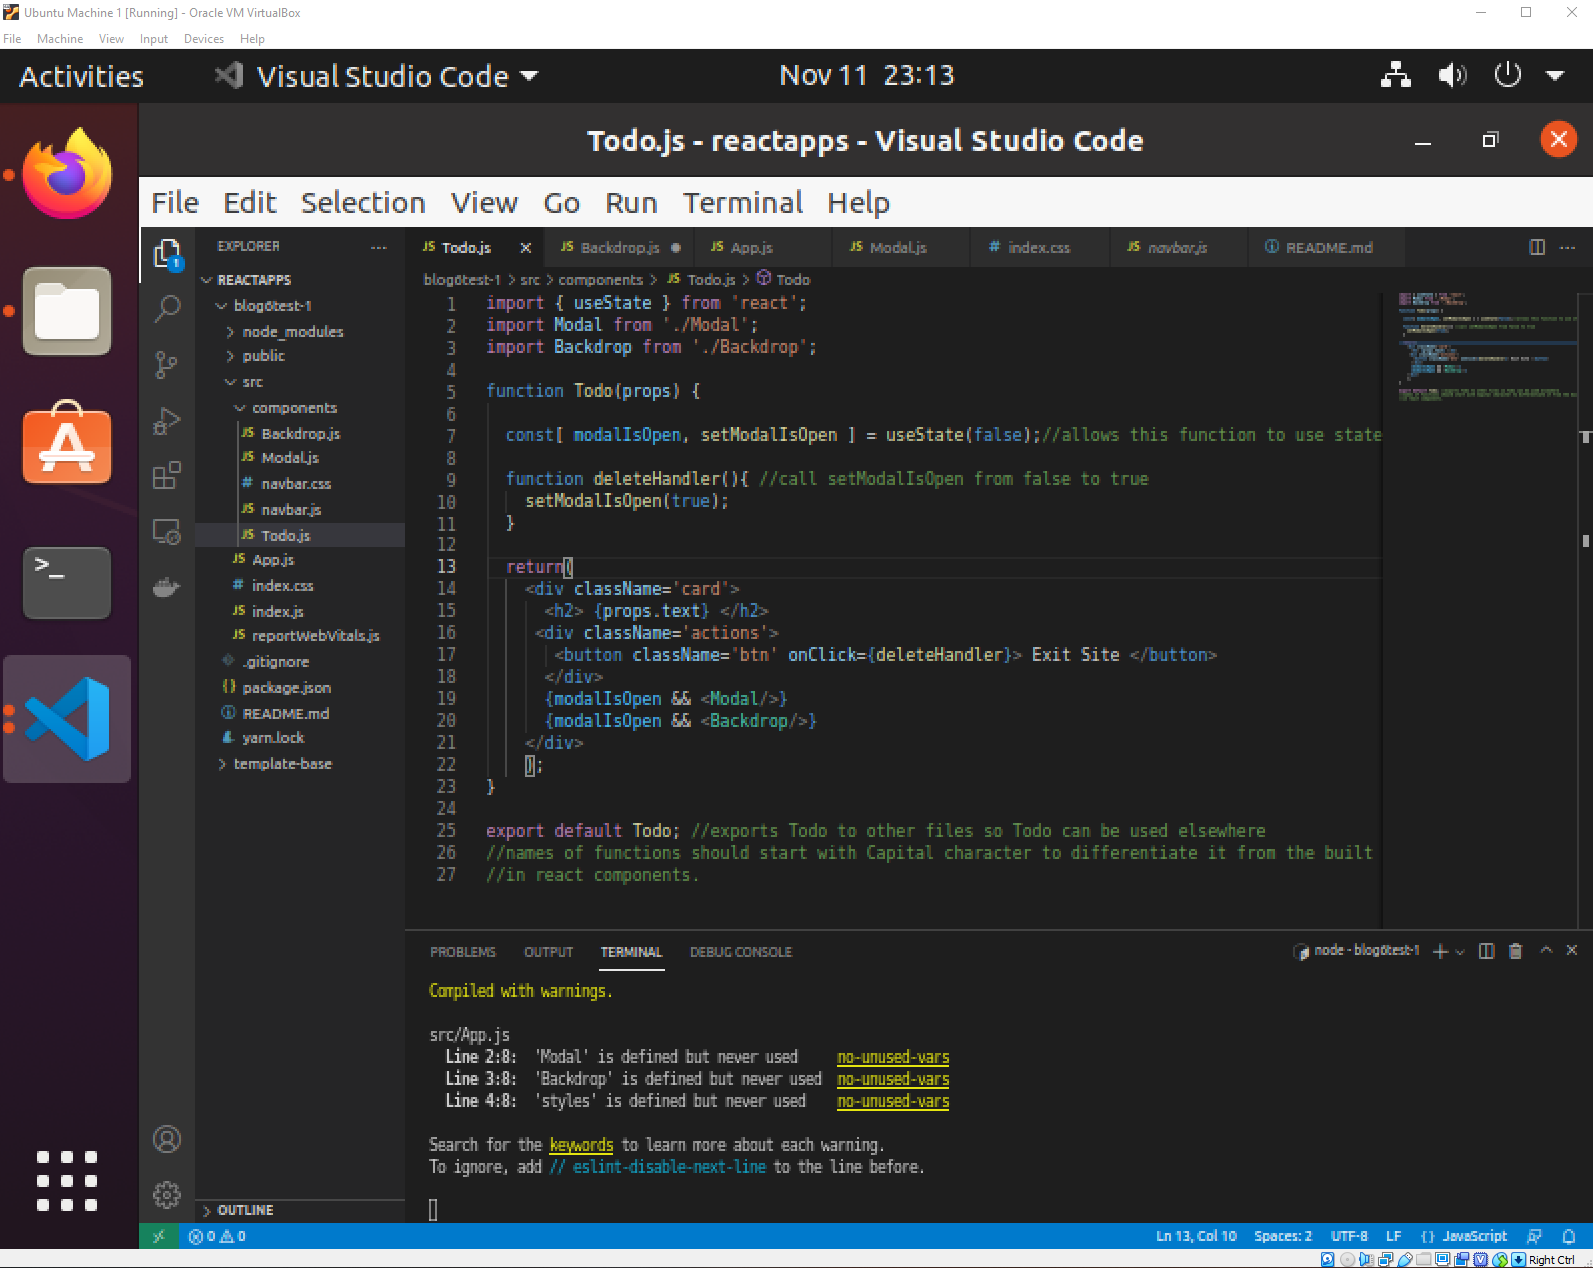
See how we we added the props parameter to the Todo function? This is because we want to pass the Todo function some parameters. Scroll back up to the picture of my lovely website. See the titles of the cards? Those were created by passing values to the function. You will also notice props throughout the rest of the todo function as well. We can access this parameter at will using curly brackets and the .text extension, as in JavaScript. It is important to remember that this is all JS, after all - not HTML!
There are a few functions I added to the buttons, as well. You may notice the onClick action in the buttons. These allow us to actually perform an action - this action is defined in our function deleteHandler which we again call using curly brackets for the onClick action. deleteHandler essentially sets the value setModalIsOpen to true, which in turn activates the checks at the bottom of the function - {modalIsOpen} && 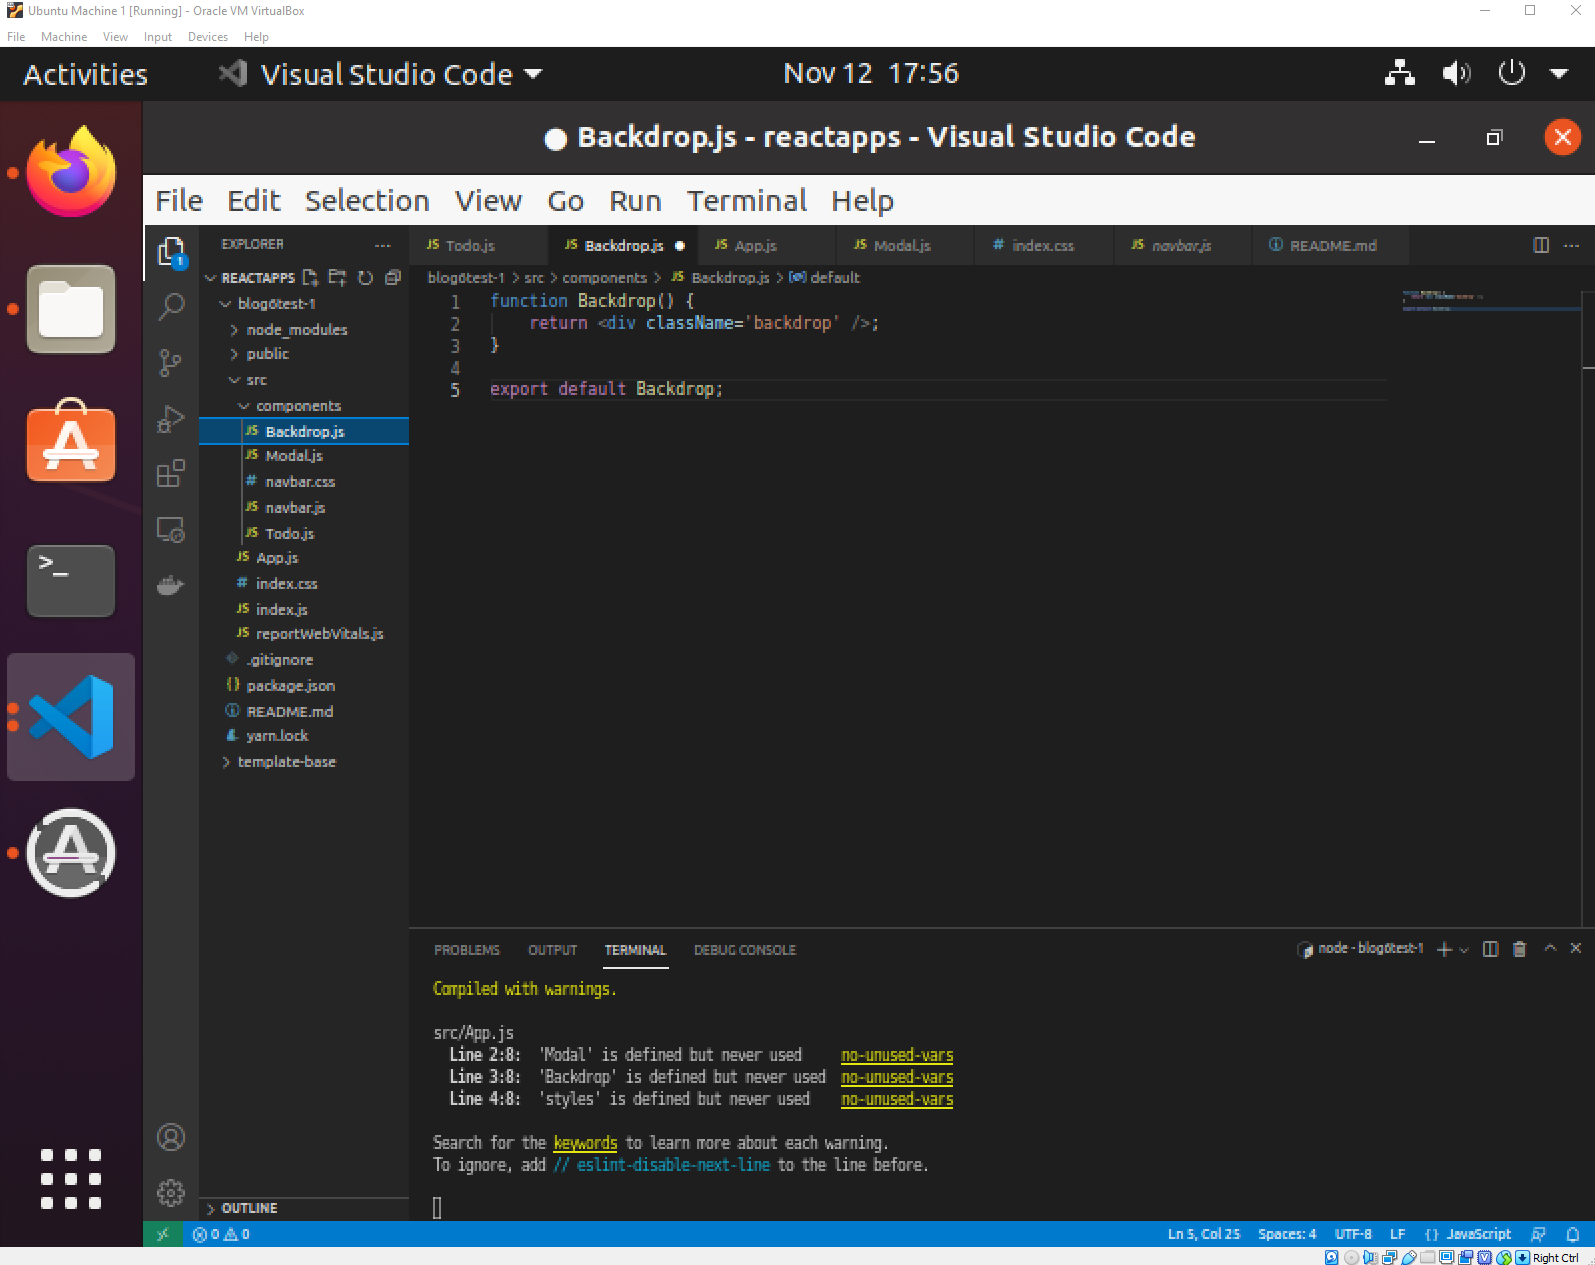
Backdrop is actually a predefined css element in our index.css file. No need to look at that again - just know that we are using a CSS style element and returning it in the function called Backdrop.
And that is how I accomplished getting this gray screen to appear! Small feat to accomplish, yes, I know. But useful. However, screens such as these are only so useful. What if we wanted to create one of those annoying pop-up ads that nobody likes that forces the user to interact with it before using the site they actually wished to access? Ahh, now you’re asking the right questions. This will be the focus of my third (and possibly final) reactJS tutorial.
Coming soon!