Introduction - Necessary Background Information
NOTE: To briefly state the obvious, this post is by no means meant to be a comprehensive introduction to ReactJS. This is more a bare-bones basics introduction to how an absolute beginner can expect to ease into interacting with ReactJS.
This tutorial also assumes that you have installed npm on your Linux-based machine, which is a dependency library that includes everything you need to get started. I also assume that you have installed VS Code and are familiar with how to use it in the command line.
Already have npm installed? Run the command npm install -g create-react-app in the CLI so that you can create new projects in React.
If you have yarn installed (I do), the steps below that deal with interacting with your React application should look nearly identical when run on your machine. However if you do not have yarn installed, you can simply use npm start instead of yarn start and achieve the similar results.
Finally, I recommend making a new directory to store your React apps in and changing your working directory to it so that all of your apps are contained in a location you can remember, but hey, who am I to stop you from just running all of these commands in your root and bloating it with files? Do what pleases you most.
Creating Your First (is it your first?) React App
From the npm library, we will be using the npx module to create React apps. The syntax we will be using to create an app is as follows (yes there are other ways to create React apps but this is the best for demonstrative purposes in my experience):
npx create-react-app appNameHere
For this demonstration, I will be naming my app blog6test-1.
It is also important to note that due to npm naming restrictions, you cannot include capital letters in your application name.
After this step completes, cd into whatever you named your app and we can get into the really exciting stuff. It should all look like this: 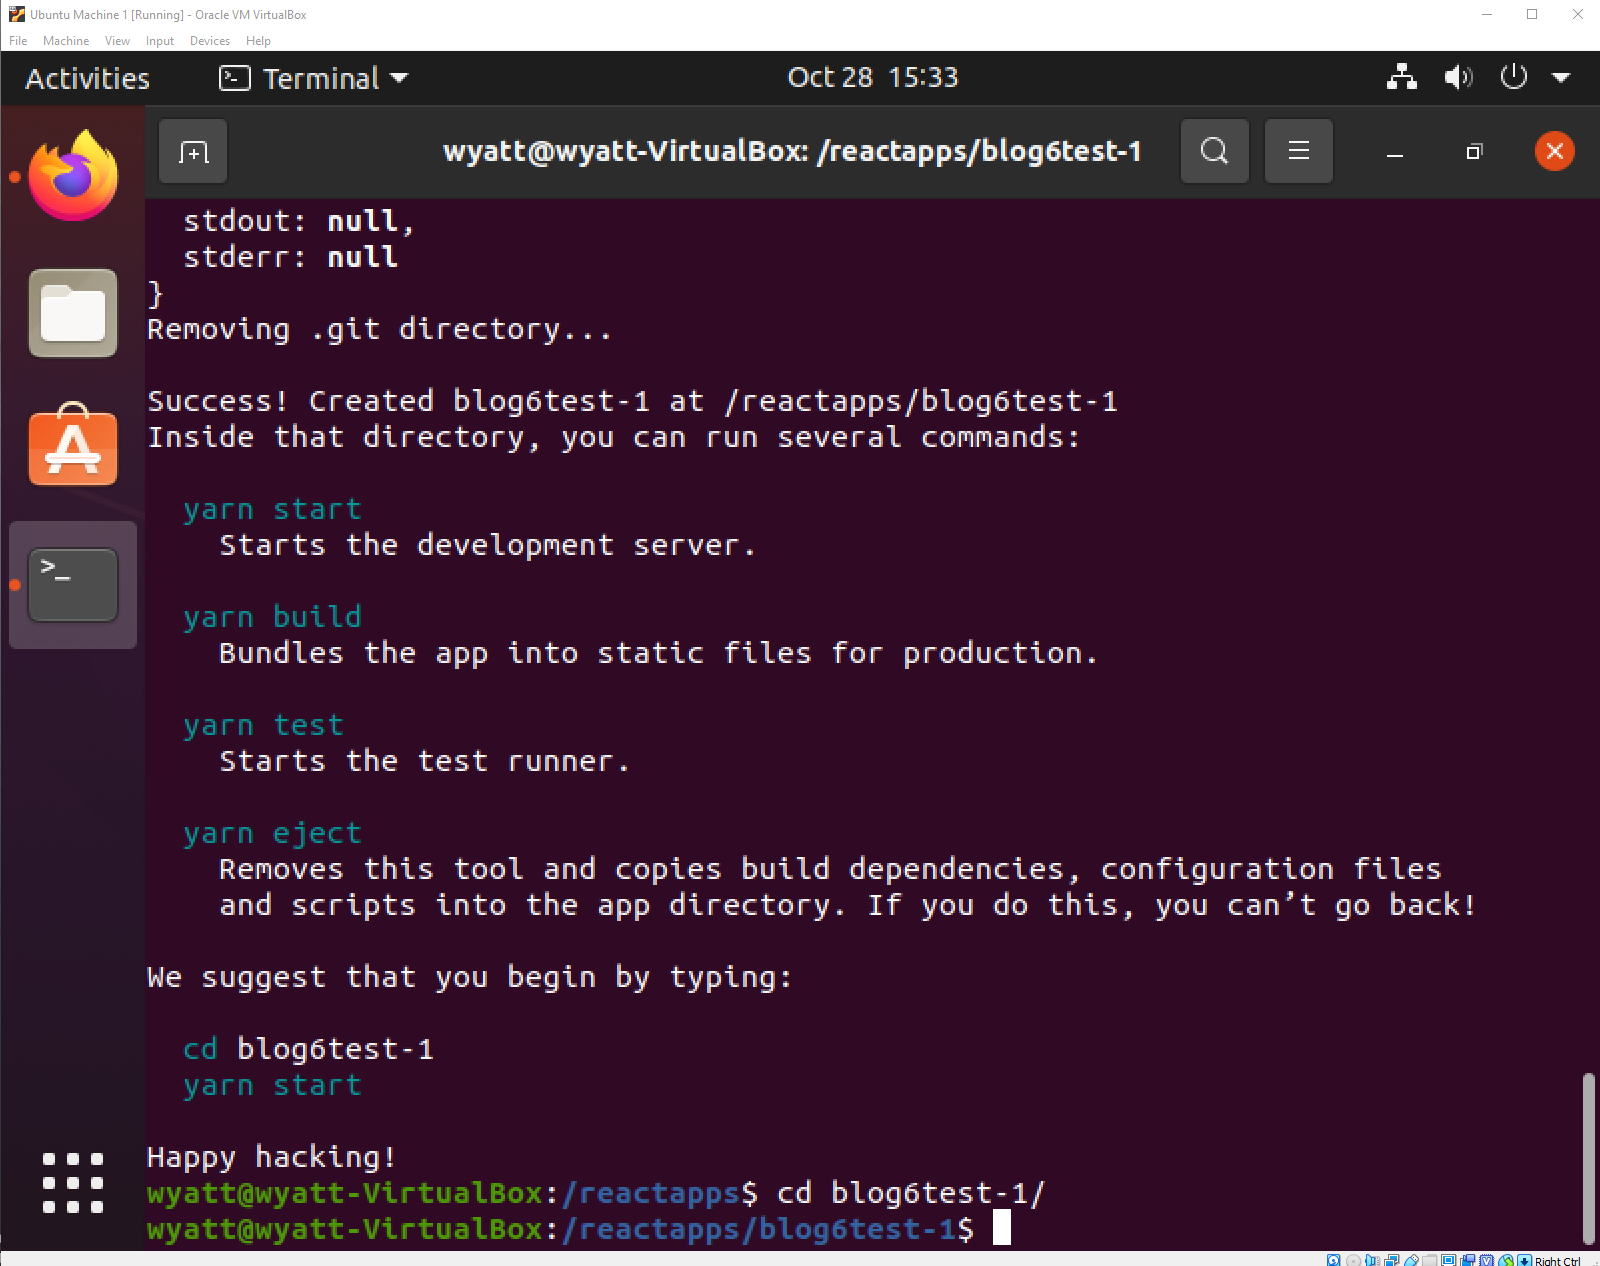
From here, I will be using my preferred editor/compiler of choice: VS Code. Once you have cd’d into your application’s file, type code . to open the current directory in VS code. Please do include the period after code. After VS Code opens, you can open a terminal with control + J and type the following: sudo yarn start. Your default browser should open up a page with localhost:3000 in the URL if all goes well, as shown below. 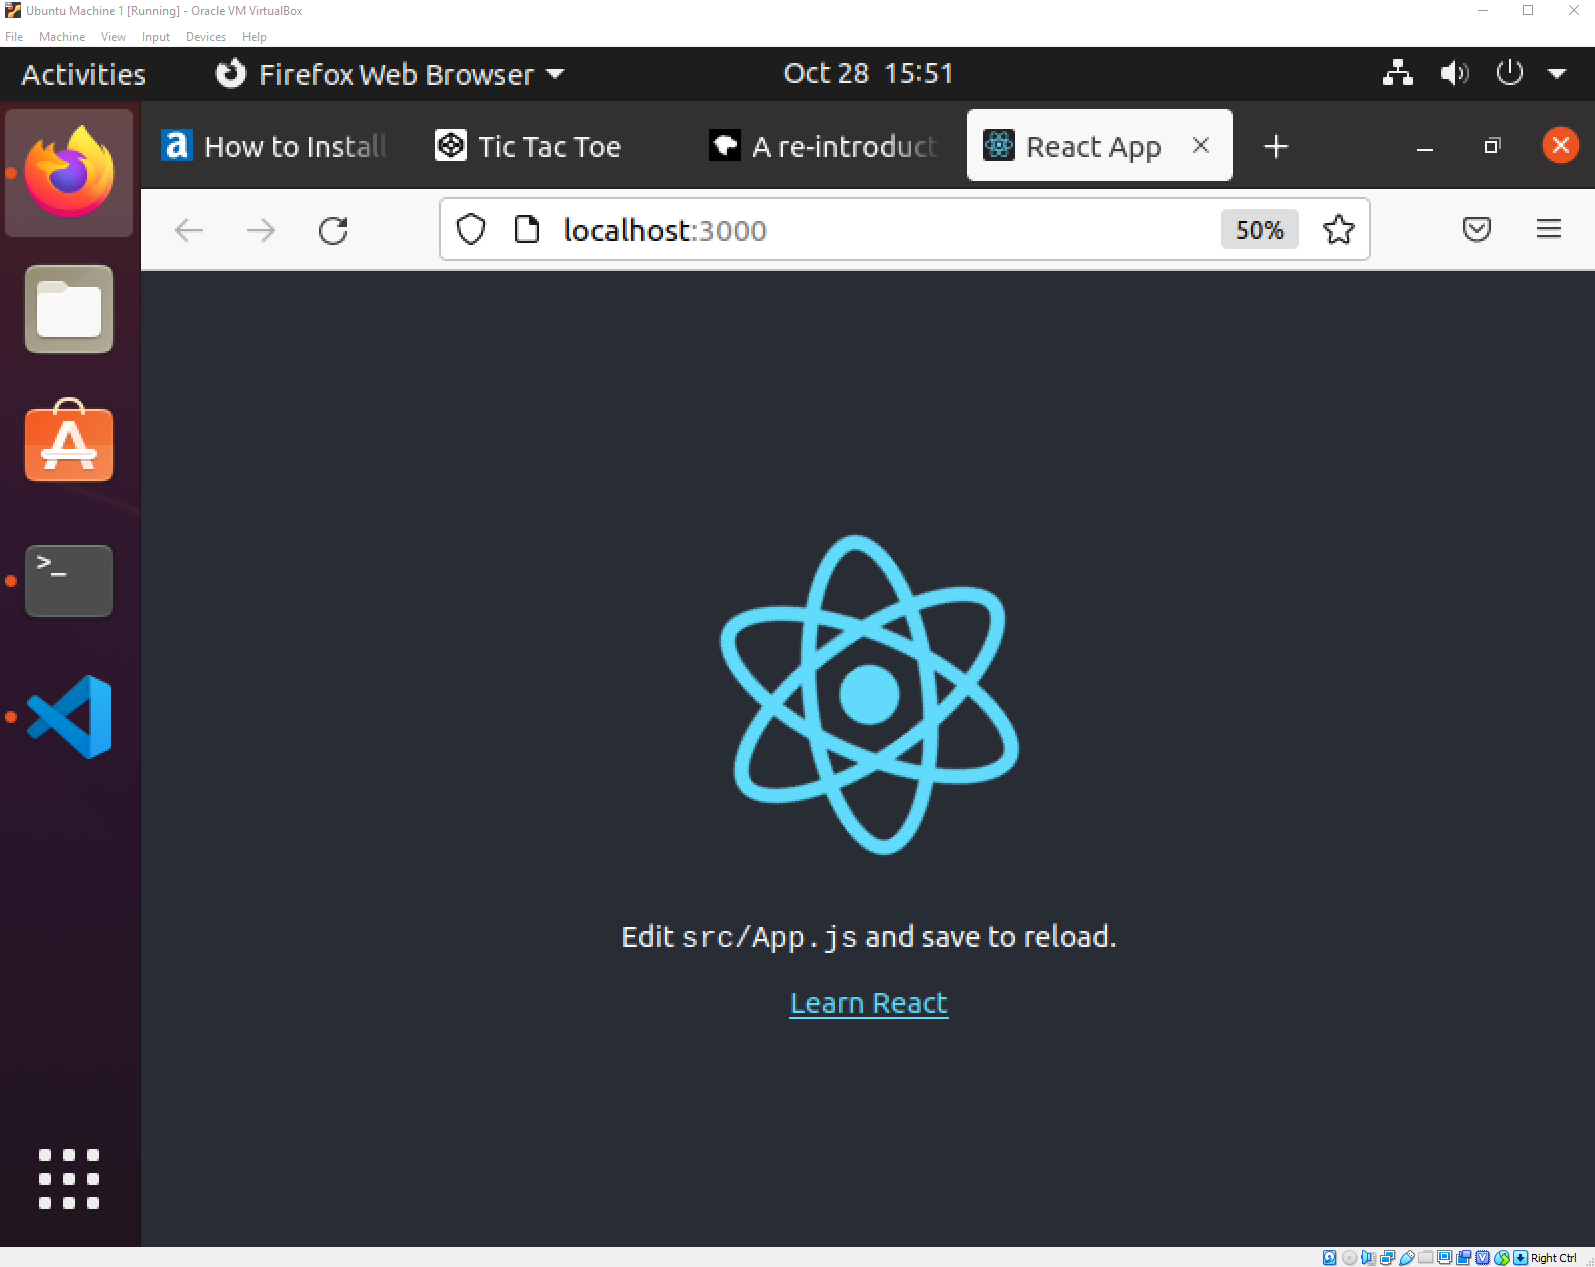
Editing the src Folder Contents
As the landing screen above suggests, we will be managing src to fit our needs here. Clearly, our ambitions as aspiring React developers extend past just creating a spinning geometric object that tells us to learn react and edit src/App.js.
There are a few things we need to delete within the src folder to really start making this app our own, so return to your VS Code window. We will be deleting setupTests.js, logo.svg, index.css and App.test.js.
NOTE: If you run into permission issues while trying to delete these files in VS Code, give yourself permissions to do so by running the following in the VS Code terminal: sudo chown -R ${USER} /pathToFolderYouKeepReactAppsInHere
Let’s begin by removing the parts that reference files we deleted in previous steps from App.js. This includes the entirety of the Header information as well as the import logo from section, as we now have no logo file. This ALSO includes things from within index.js - namely, the import ‘./index.css’ code chunk.
Index.js should look like this now: 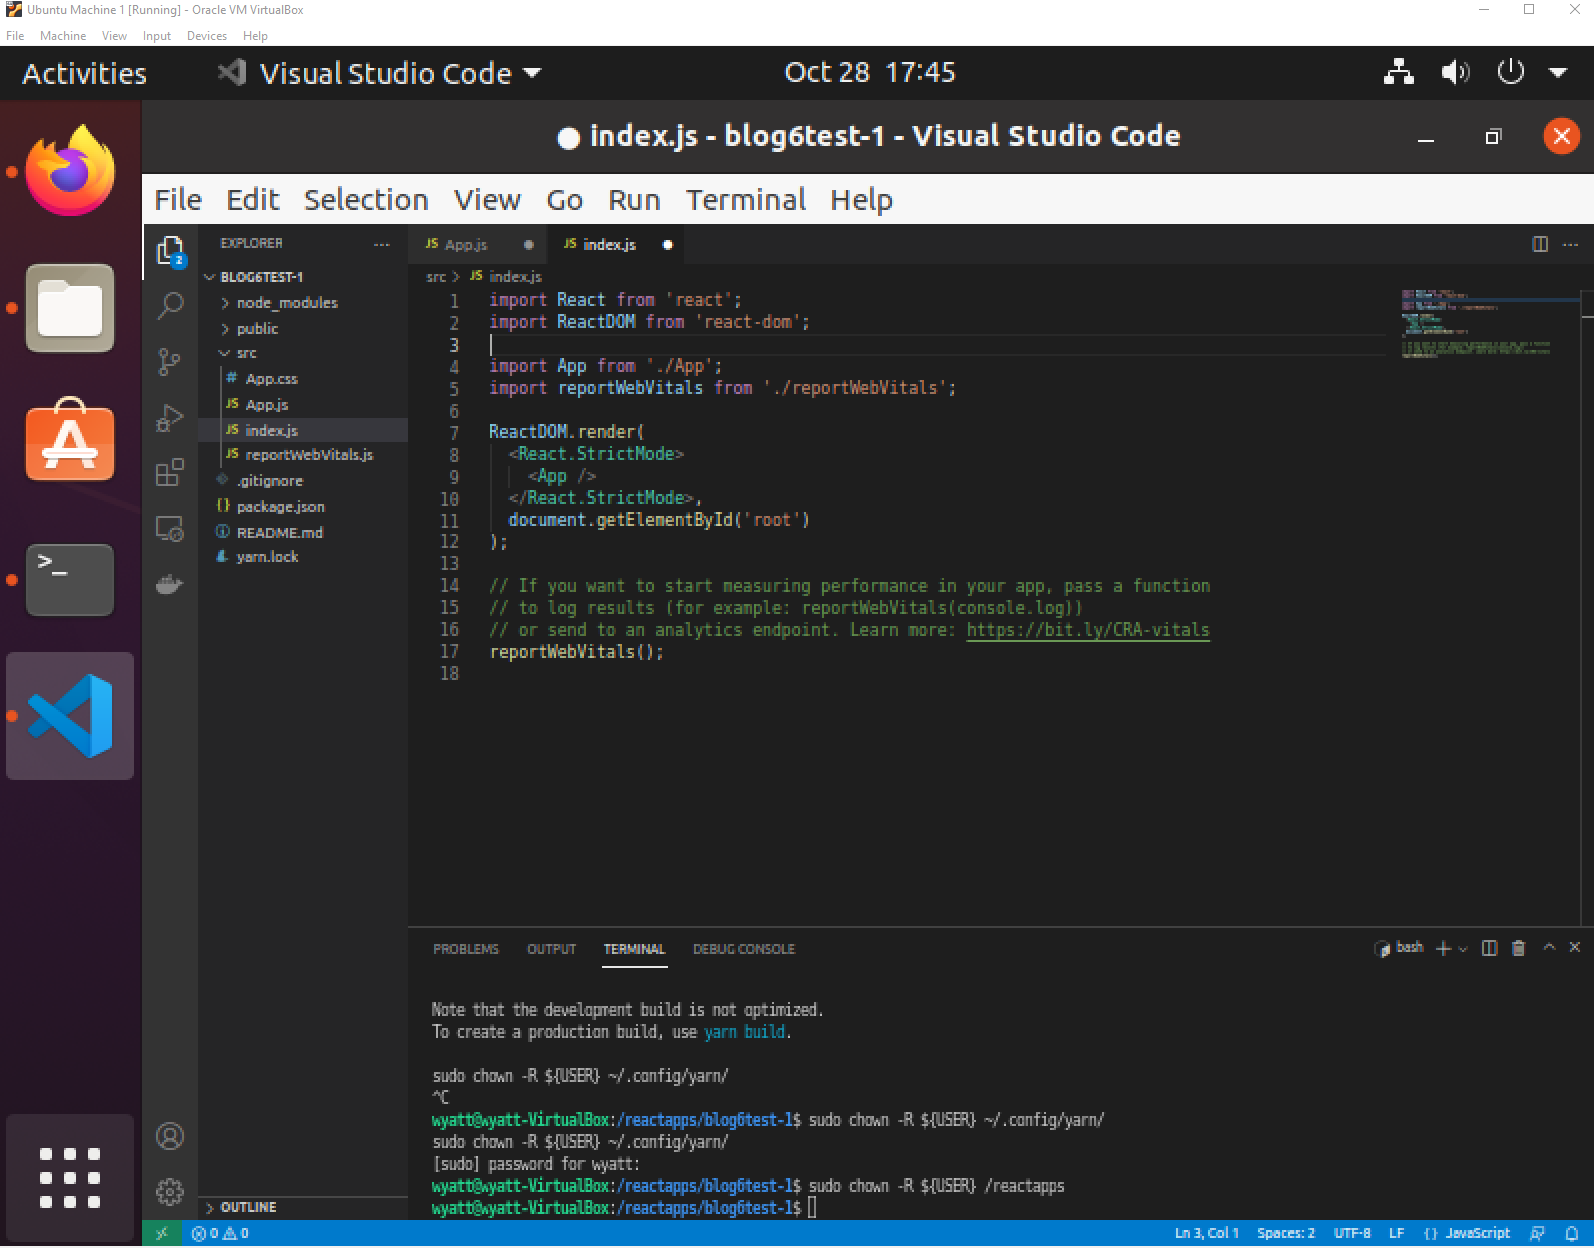
And App.js should look something like this now (the new h1 tag that says Welcome to Earp Industries is a test to show that we can still edit our application) 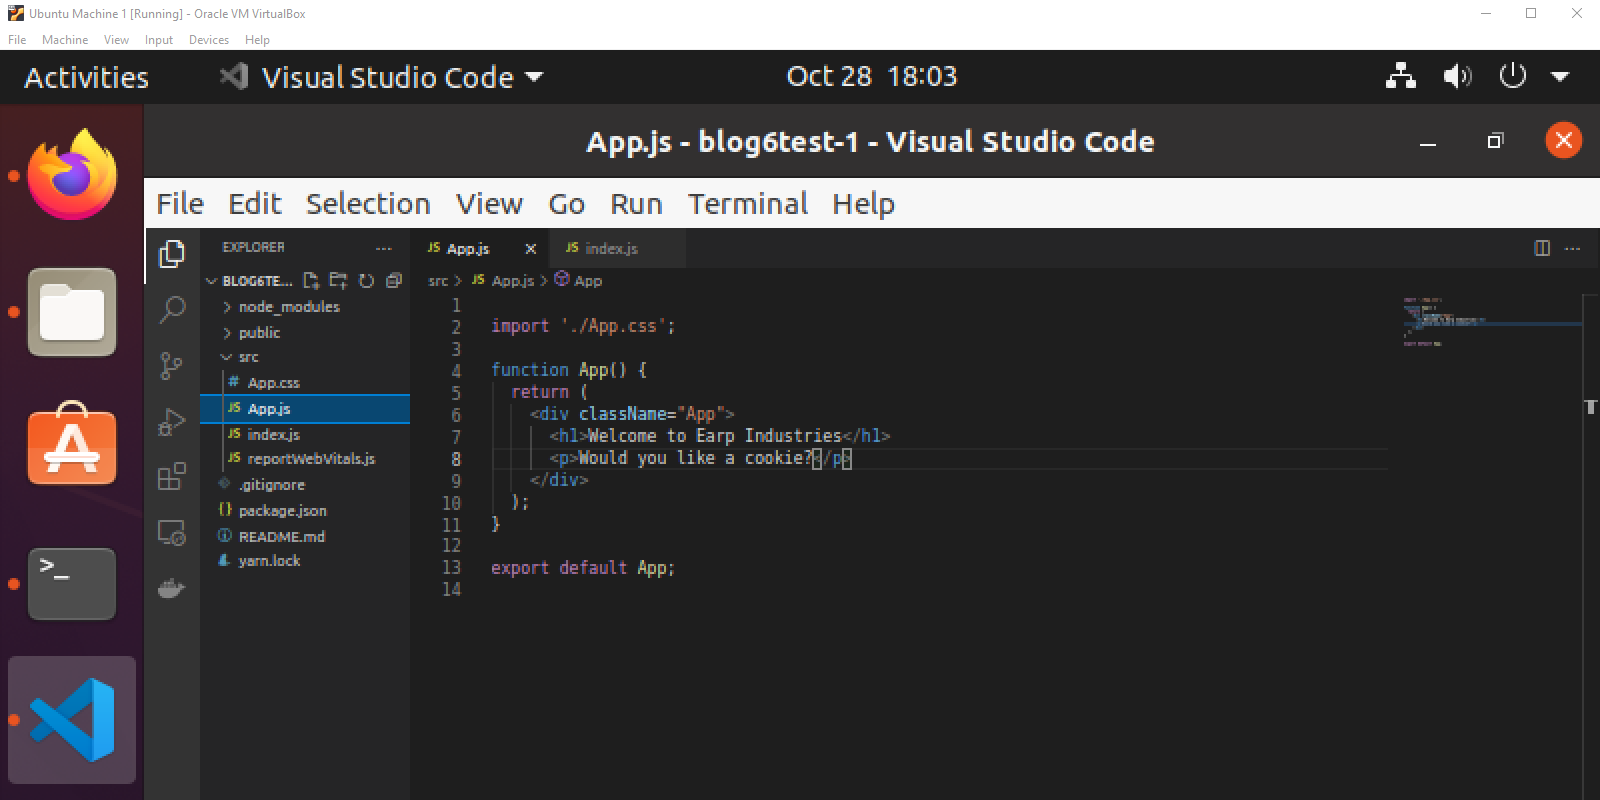
Of course, please save both of these files (CTRL+S).
If all goes well, go back to your webpage (if you closed it, just run yarn start in vs code again assuming you are still in your app folder) and refresh and you should see a screen similar to this one: 
Conclusion
For now, this is where I will leave off this very basic introduction to ReactJS. I will be expanding upon what we can now accomplish with this basic framework in the future, of course, as this post is titled as being part 1 of course.
The goal of this series is to create a functional front-end website that will one day host a Golang-based back end web application. I may or may not document the process of connecting Golang code as a back-end into the ReactJS website to create a fully functional web application - it depends on time limitations, but ReactJS will be a great place to begin building the frame upon which my application will live. More to come!