Introduction - Pre-requisite Software
NOTE: I assume here that you have access to a GitHub account and have already created a repository.
In order to expedite and simplify the process of committing and pushing changes to one’s GitHub repository, I discovered that making use of Visual Studio Code’s source control feature was indispensible to saving me time and effort. It is relatively painless to set up, too!
The following are the pre-requisite software downloads: GitHub Desktop, Git Extensions, and Visual Studios Code must all be downloaded before you can begin saving time committing changes and pushing them onto your GitHub website. For our purposes, default settings for all of these pieces of software will be more than sufficient. Skip right on through those setup wizards.
Setting Up Visual Studio Code
Now that you have all of the dependencies, let’s move on to retrieving your GitHub repository from GitHub itself. We will start by visiting GitHub’s website. From there, open the repository you wish to use with VS Code. Click the green “Code” button as seen below, followed by Open with GitHub Desktop. 
This is where the GitHub Desktop app that you installed earlier comes into play. Follow and accept the prompts to allow GitHub Desktop access to your GitHub account. From inside the application, add your repository to the list. Once you have imported your repository from GitHub, select Open in Visual Studio Code, which will enable you to begin the process of adding a remote repository to push your changes to.
Select View > Command Palette, type Git: Add Remote…, and copy-paste your repository link in this format: https://github.com/yourGHnamehere/reponamehere.git.
NOTE: If you cannot get the Git command Add Remote to show up in the Command Palette, make sure that you have Git enabled as shown below. 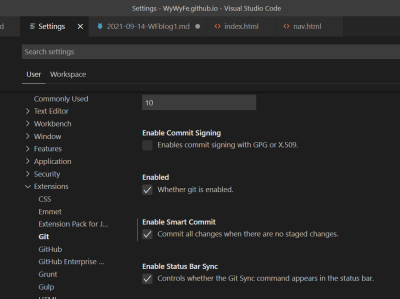
If after checking for Git you still cannot find it within the settings panel, double check whether you installed the Git extension in the introduction phase correctly.
After that, feel free to add/edit onto your repository in a user-friendly interface via Visual Studio Code. If you want to commit changes to your repository through Visual Studio Code, make sure that you enter the Source Control pane on the left-hand side, and first stage and then commit changes before you push them, just as you would do if you were using the command line (also shown below). 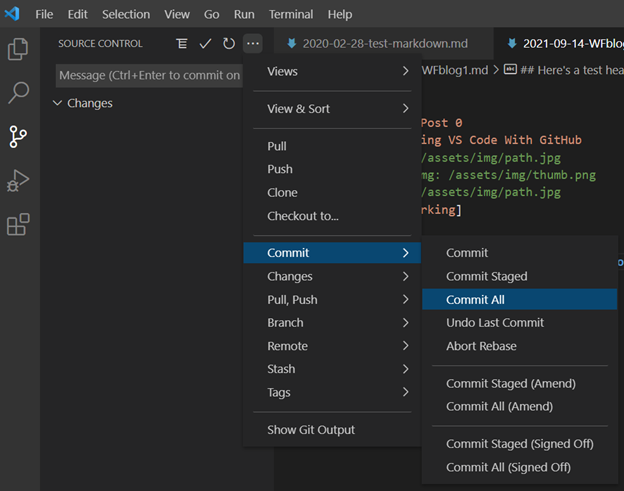
That’s all there is to it. I very much prefer this method of interacting with GitHub. In my opinion, it is easier to deal with file directories from within the context of Visual Studio Code than it is to interact with and make individual changes via the command line.
Enjoy!